Step1: Purchasing a Msyt Nodes license
SenseCAP dApp Center has launched three dApps, namely Flux, Helium, and Myst Nodes, with plans to release more dApps gradually. To activate and run the Myst Nodes dApp within its validity period, a license is required for Myst Nodes and future dApps.
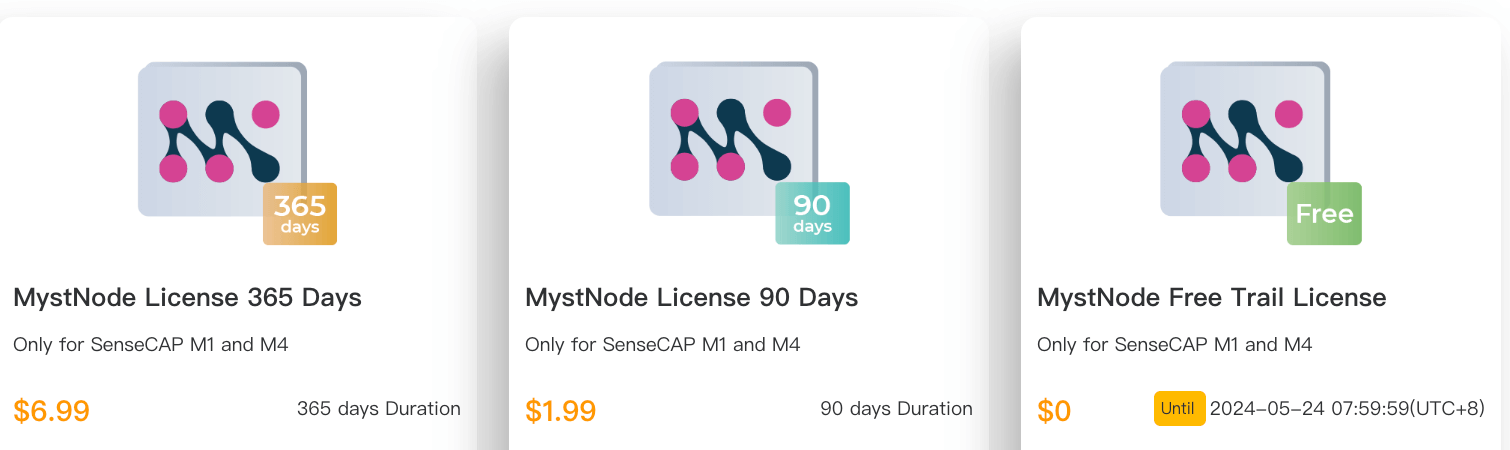
Note: The Myst Nodes Licenses are exclusively for SenseCAP M1 and M4 devices to activate the Myst Nodes dApp. They cannot be used for other devices.
1 Log in to SenseCAP Hotspot Dashboard
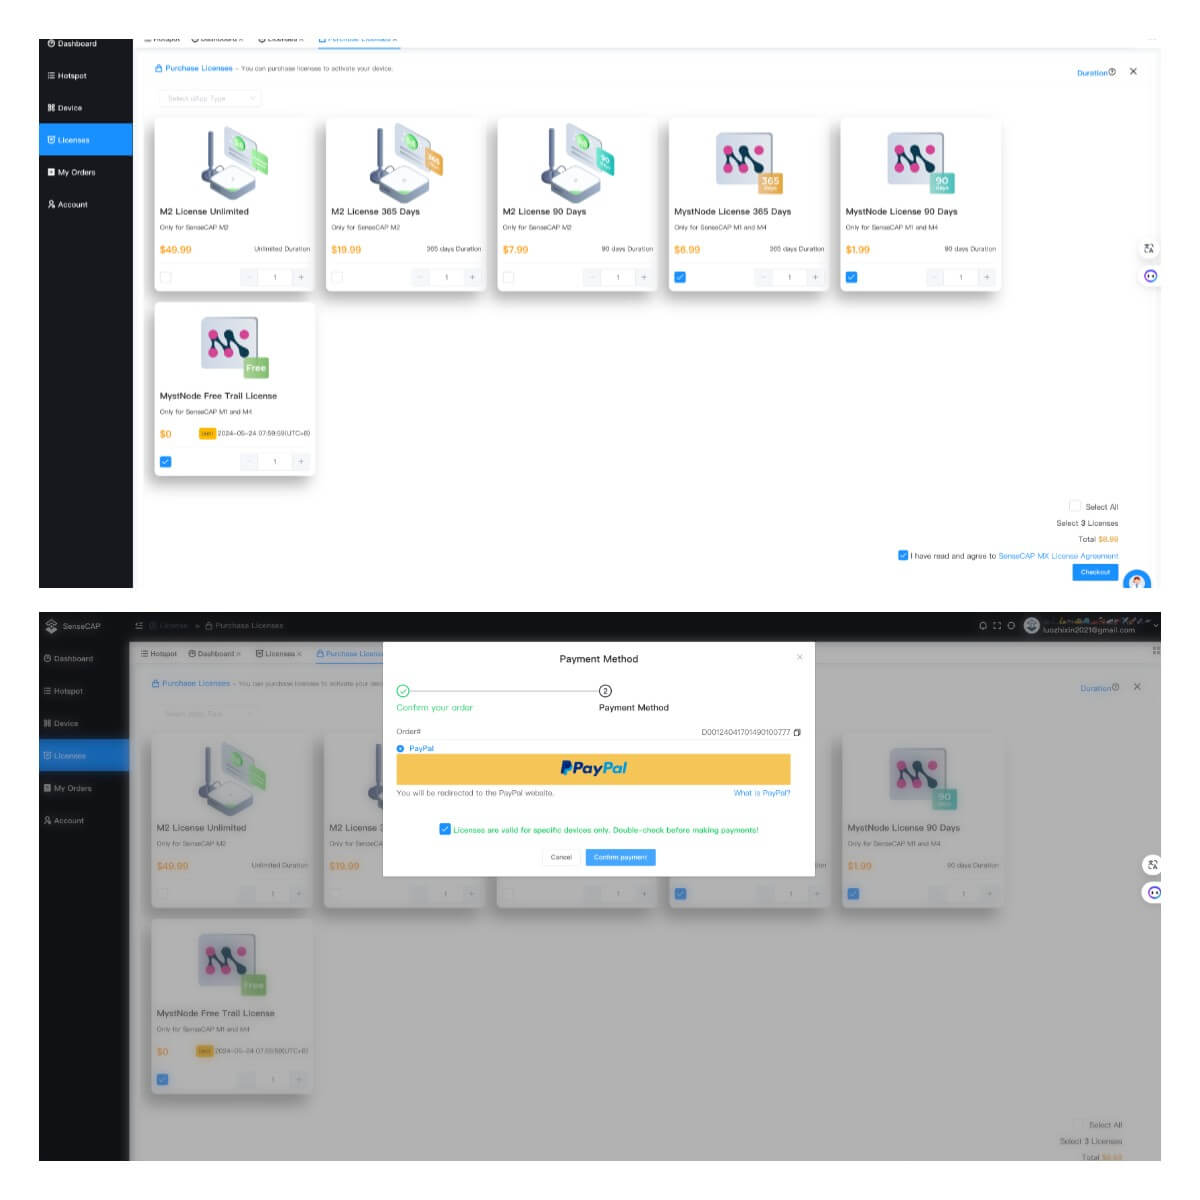
2 Go to the license page and click on the “Purchase” button to acquire the Myst Nodes license according to your requirements.

3 Choose the Myst Nodes license option and proceed to pay for your license order using PayPal.
4 Once your order is completed, the license will be automatically generated. You can now proceed to deploy the Myst Nodes dApp on your SenseCAP M1 device.
Step2 : Adding your SenseCAP M1 to the Dashboard
If already added, go directly to Step 3
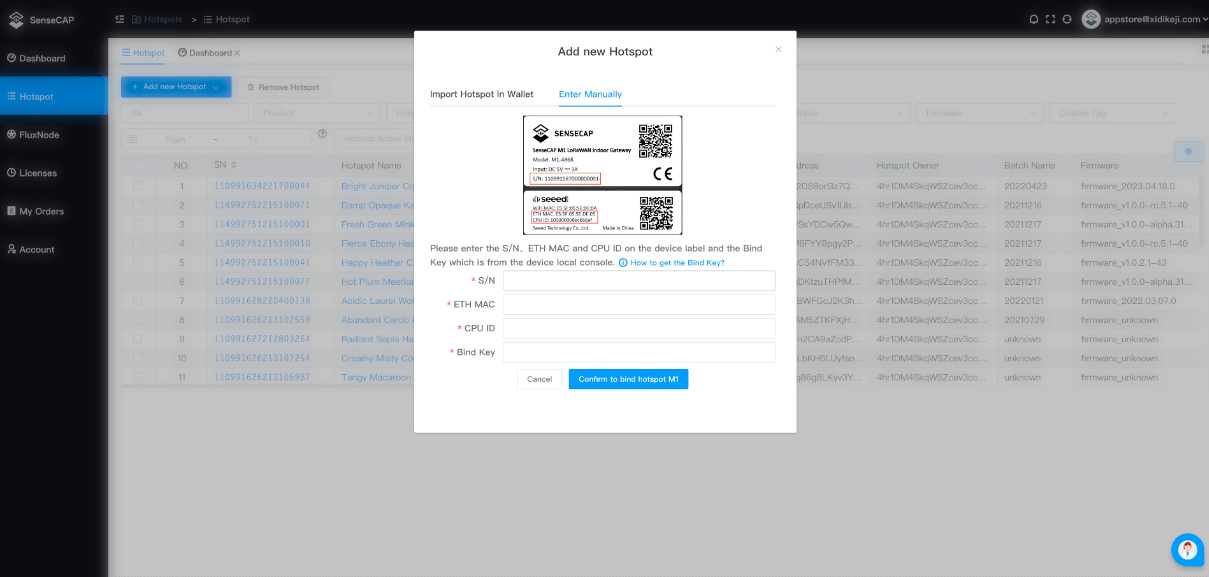
1 Input the SN, ETH MAC, CPU ID, and Bind key of your SenseCAP M1 device to add it to the dashboard.
2 If you don’t have your SenseCAP M1 device with you, you can use the SenseCAP Hotspot App to add your M1 hotspot. Simply provide the hotspot address and verify it using the hotspot’s Helium wallet.
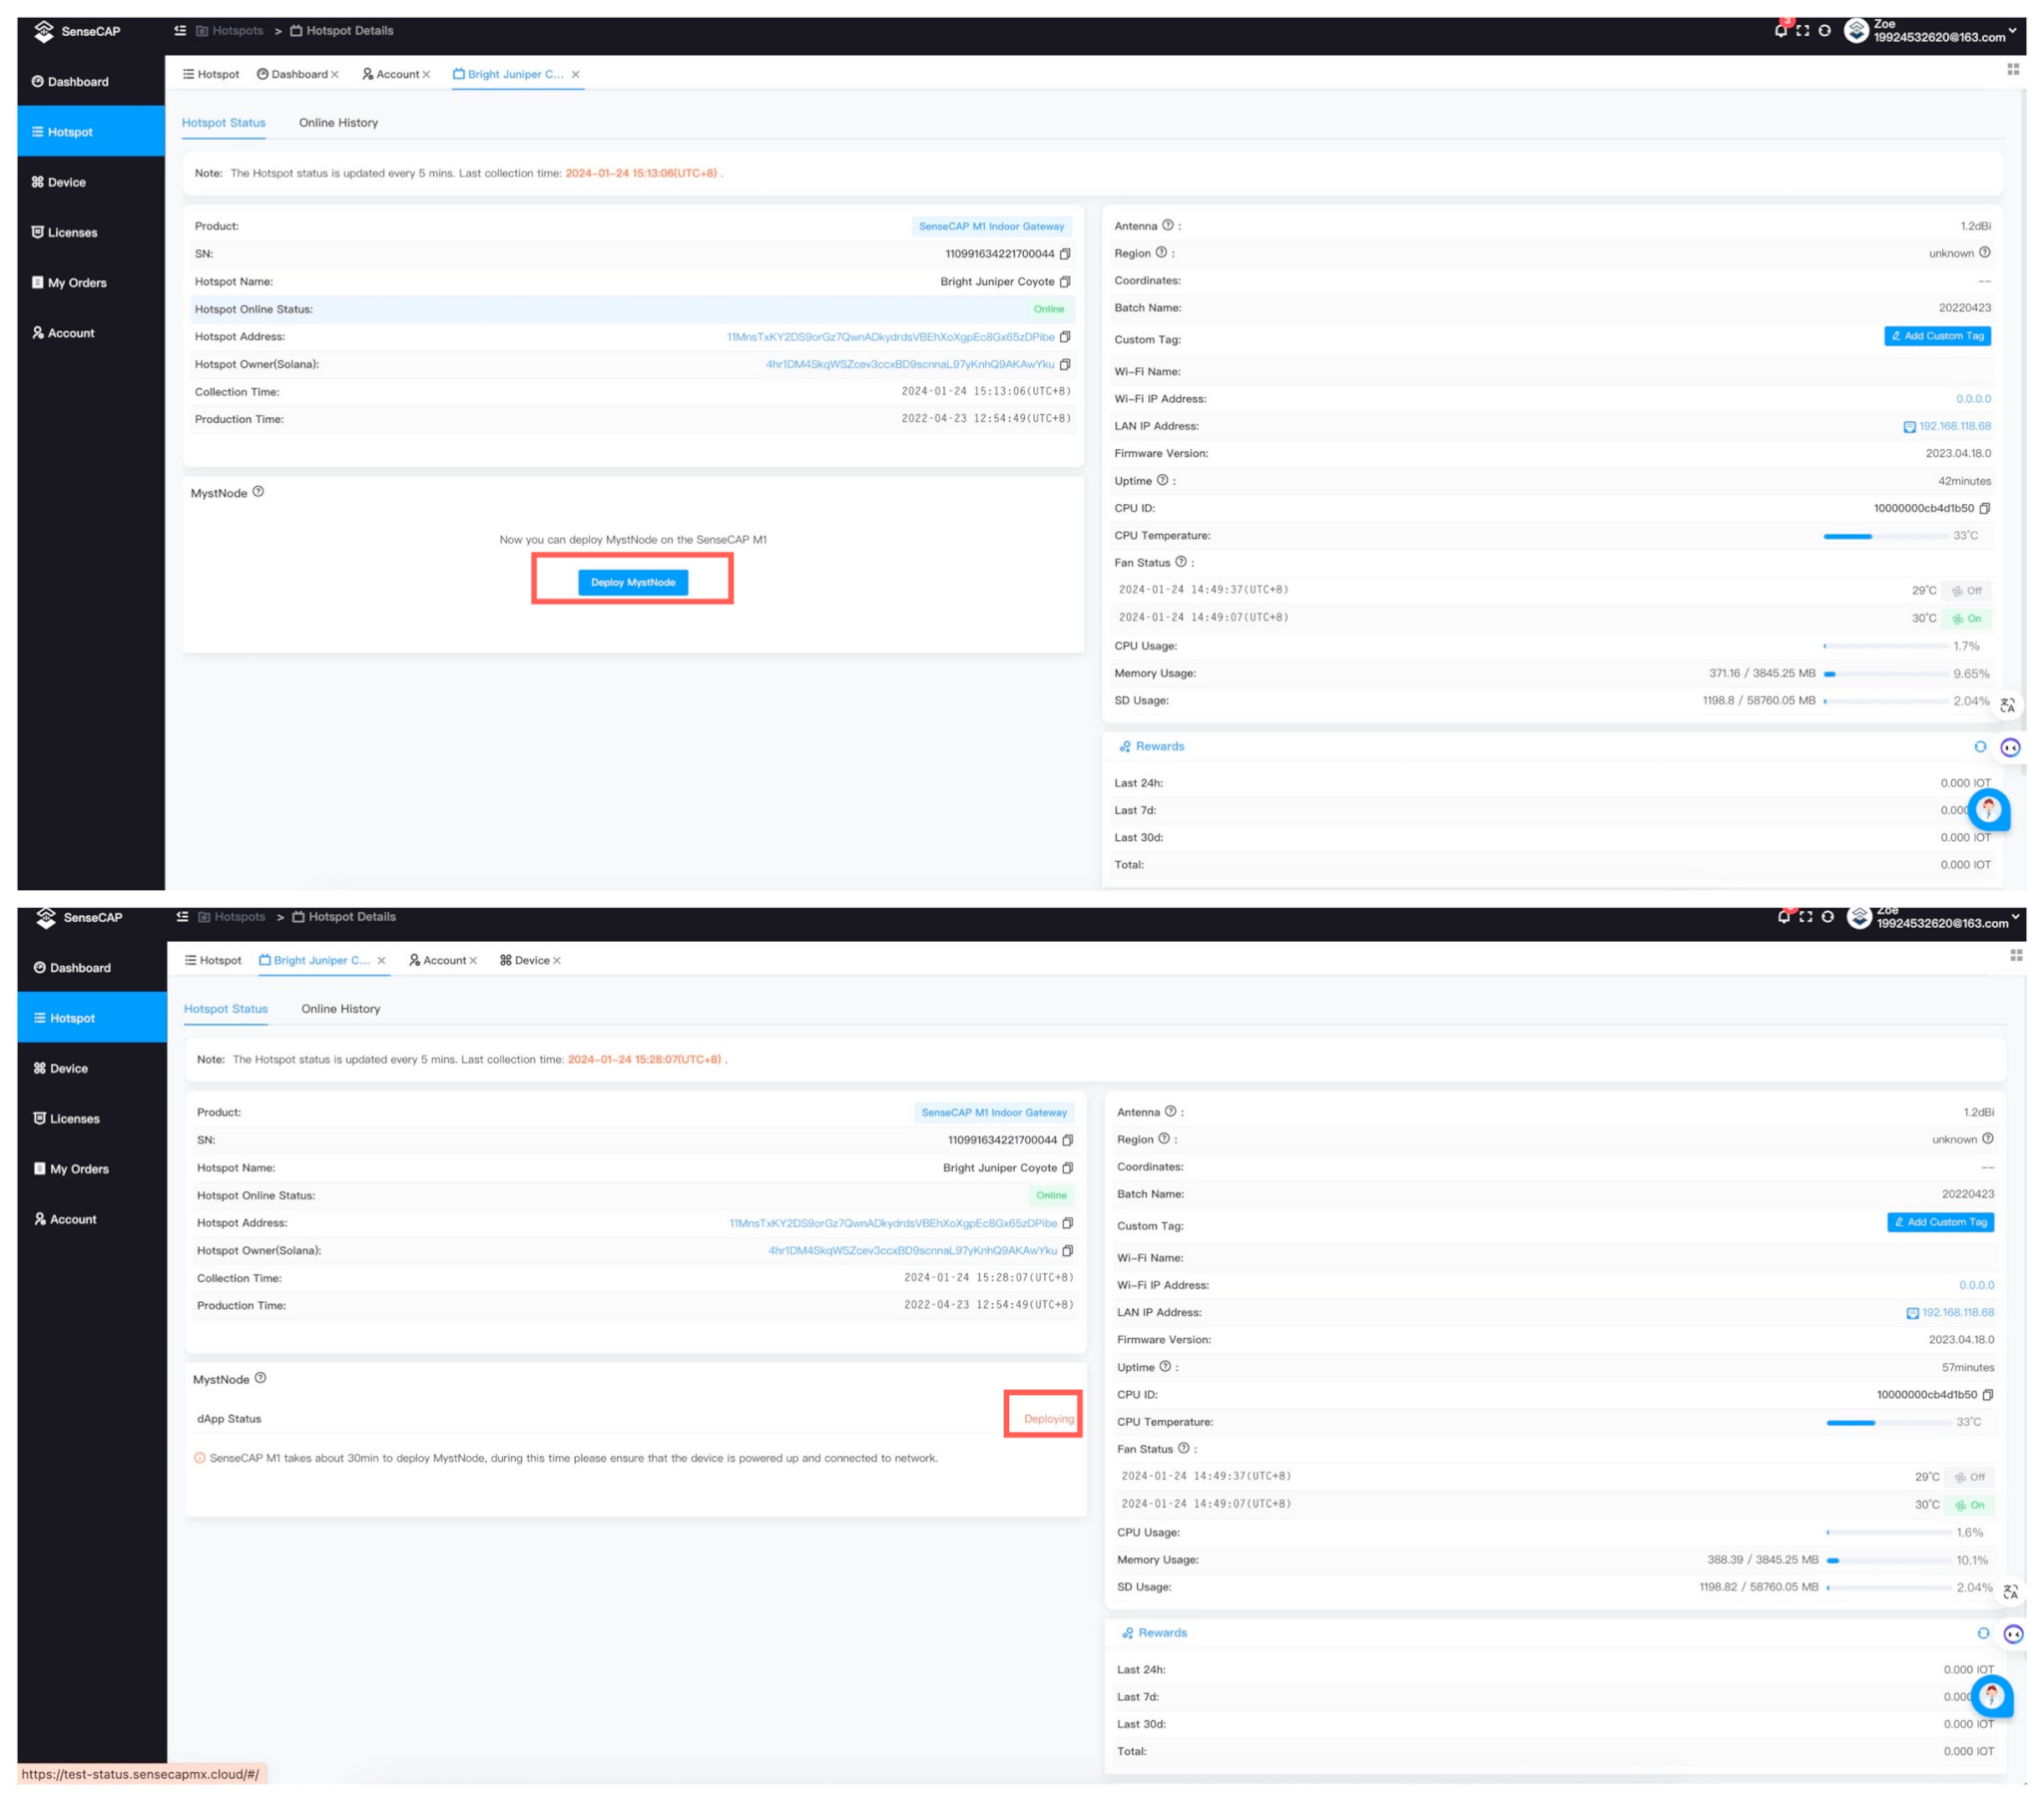
Step3: Deploying MystNode on SenseCAP M1
1 Go to the detail page of your M1 hotspot and click on the “Deploy Myst Nodes” button.
2 Make sure that the device is powered up and connected to a reliable network.
Note: For successful deployment and optimal performance of the Myst Nodes, it is important to have a good quality network connection. To ensure the M1 operates smoothly and generates good revenue, we recommend using a network with speeds greater than 50 Mbps. If your current network speed is below 50 Mbps, consider switching to a faster network for optimal results.
Step4: Activating MystNode dApp with a License
1 Once the deployment of Myst Nodes is completed, you can proceed to activate it using a license.
2 Click on the ‘Activate Myst Nodes’ button and choose a license from the available options to activate Myst Nodes.
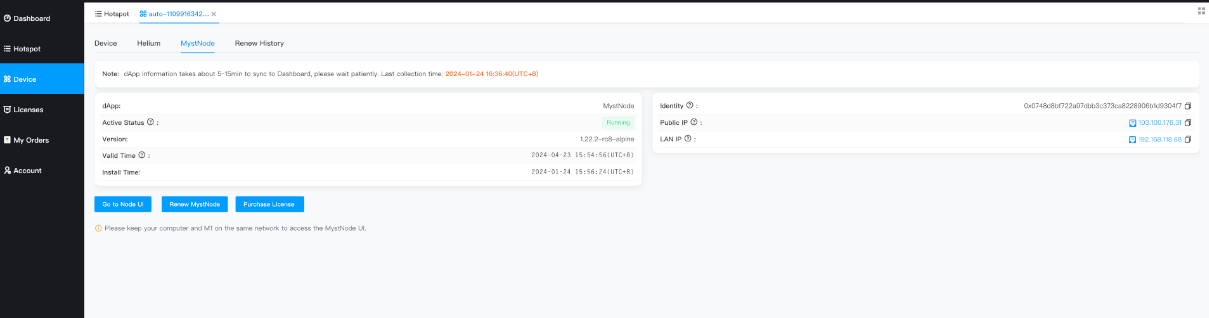
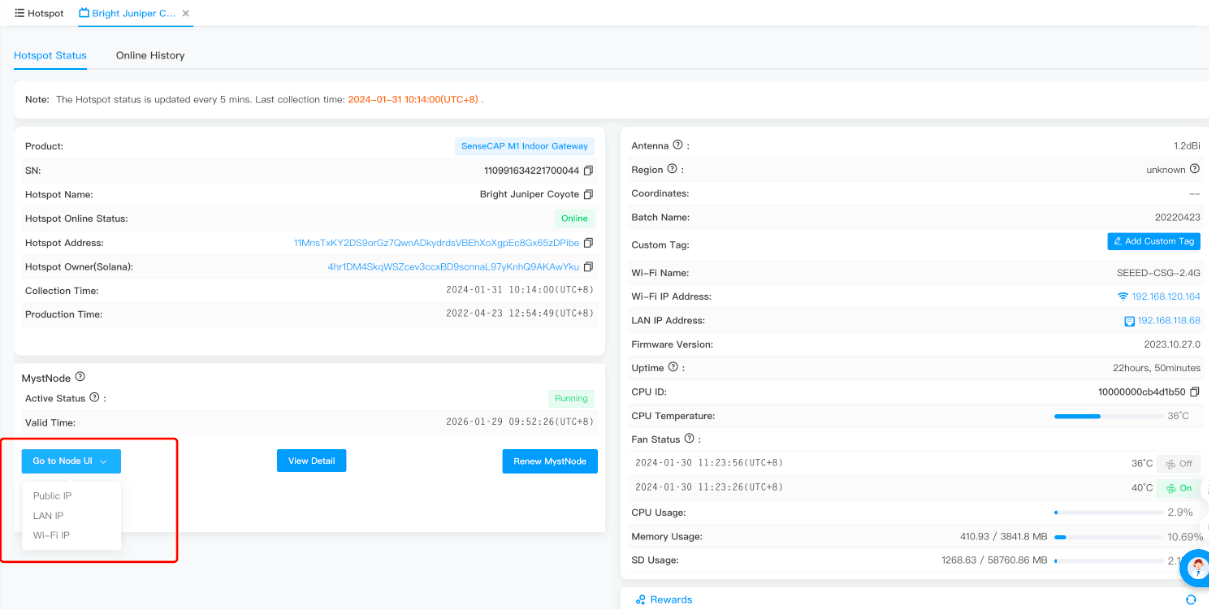
3 The activation of the Myst Nodes dApp is now complete. Please allow approximately 5 to 10 minutes for the startup process to finish. Once the startup is complete, a “Go to Node UI” button will be available. Click on this button to register the Myst Nodes on the blockchain.
- Public IP: Go to Node UI via the M1’s public Ip and ensure open port 10000:60000/udp on the router to which the M1 is connected. we recommend closing the port when access via public IP is not required
- LAN IP: If the M1 connect LAN network,you can go to Node UI via LAN IP
- Wi-Fi IP: If the M1 connect Wi-Finetwork,you can go to Node UI via Wi-Fi IP
Step 5: Regsistering the Mysterium Node to the Blockchain
In celebration of the partnership, Mysterium (the network built by all Myst Nodes) is offering an exclusive referral code: SEEED5MYST. By using the code (SEEED5MYST) during sign-up, users will be eligible for a special reward. Once the reward reaches 5 MYST, the user will receive an additional 5 MYST for free. Please note that each account can only receive this reward once.
1 To proceed with the registration, please log in to your Mysterium node account. If you don’t have an account, you can sign up using the referral code (SEEED5MYST) and then proceed to log in.
Note: To celebrate SenseCAP release Mysterium dApp, Mysterium offers an exclusive SenseCAP referral code:SEEED5MYST. User use redemption code(SEEED5MYST) to sign up to Mysterium. when the reward reaches 5 MYST user will receive free 5 MYST(One account can only get 1 time for free)

2 Congratulations on a successful login! Your account will be automatically synchronized with the Identity of the Mysterium Node.
Note: During the registration process of a node to the blockchain, new Mysterium accounts will not be required to pay the $1 registration fee. Please keep in mind that each account is eligible for this fee waiver only once.
3 Before proceeding, please ensure that your wallet address is from an ERC-20 Polygon-compatible wallet. Mysterium officially recommends using MetaMask as it is compatible with Polygon.
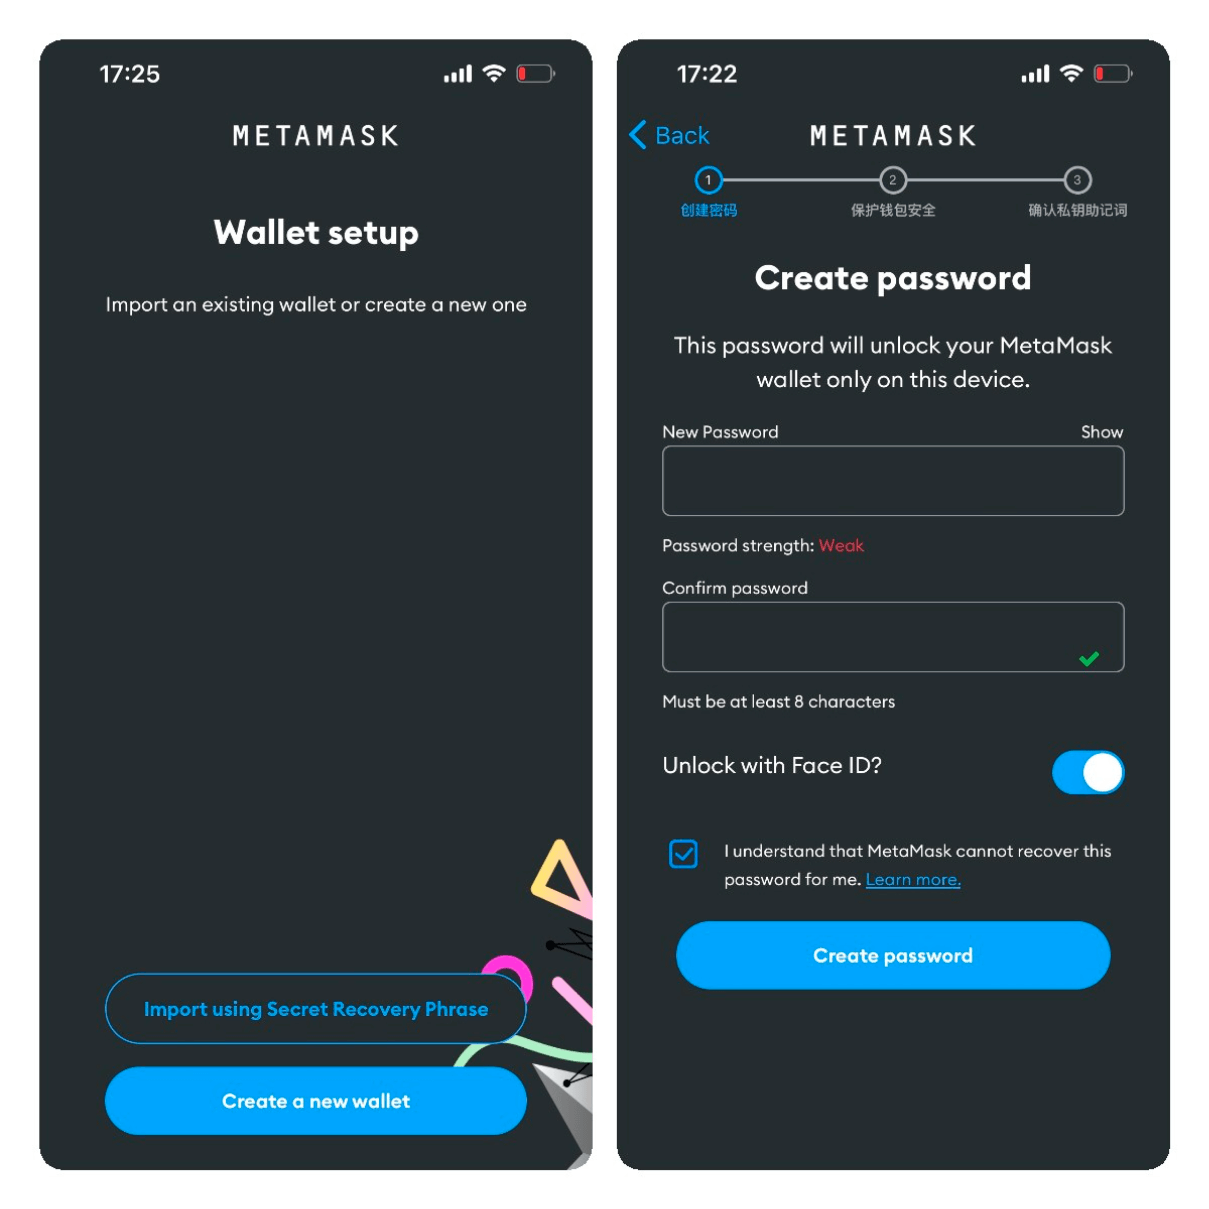
4 To begin, install the MetaMask App on your mobile phone or install the MetaMask plugin on your PC browser. This tutorial will be based on the MetaMask App.
5 Open the MetaMask App and create a new MetaMask wallet. It is crucial to write down and memorize the private keywords provided during the wallet creation process, as they cannot be recovered if lost. Take the necessary precautions to secure your private keywords.
6 Adding MYST Token to MetaMask on the Polygon Mainnet
- Copy the Token Contract Address for MYST from the Mysterium official source. You can find this address on PolygonScan by following the link provided by Mysterium.
Note: It is essential to verify the accuracy of the MYST token details from the official Mysterium source. Please refer to the Mysterium link to ensure that the copied information, including the Token Contract Address, is correct.
MYST token details
Token Contract Address on PolygonScan:0x1379e8886a944d2d9d440b3d88df536aea08d9f3
Symbol: MYST
Decimals: 18
- Ensure that the MetaMask app’s network is set to Polygon Mainnet. If you do not see Polygon Mainnet as an option, you can go to the network settings, select “Add Network,” and find Polygon Mainnet to add it.
- Once you have set the network to Polygon Mainnet, click on “Import tokens” at the bottom of the MetaMask app.
- In the “Token Address” field, paste the Token Contract Address that you copied from the Mysterium official source.
- Click on the “IMPORT” button to import the MYST token into your MetaMask wallet.
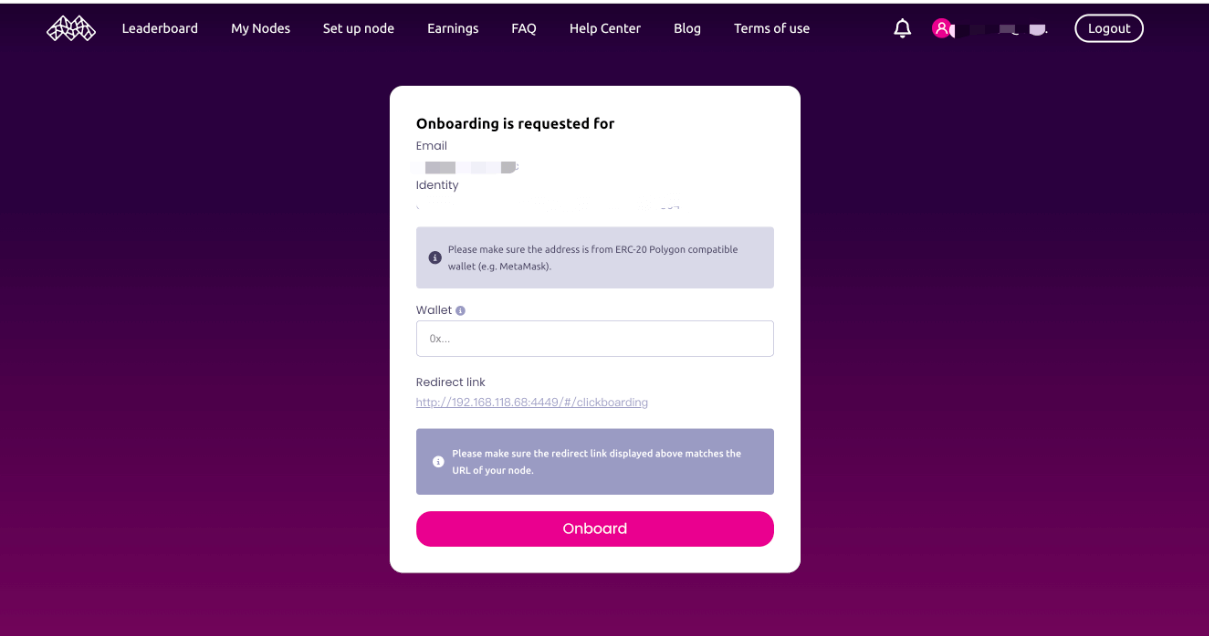
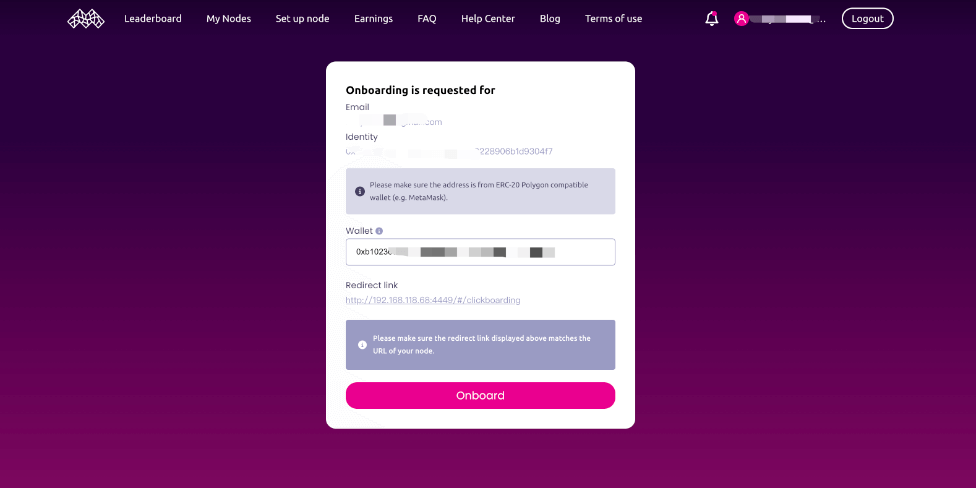
7 At this point, you can copy the MetaMask address associated with your wallet. Once you have copied the address, return to the Mysterium Node UI.
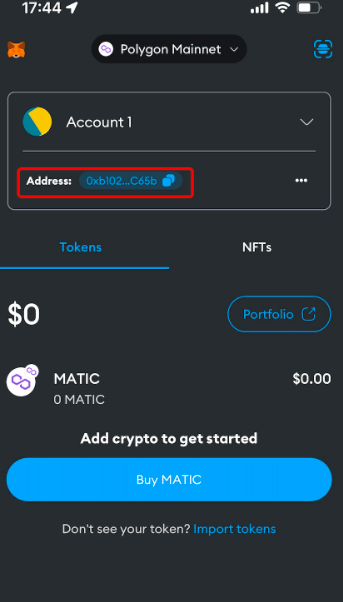
8 In the Mysterium Node UI, paste the MetaMask address you copied into the appropriate field. Then, click on the “Onboard” button to proceed.
9 Congratulations! You have successfully onboarded your SenseCAP M1 to Mysterium, and it will now begin providing decentralized VPN (dVPN) services.
Note: To access the Mysterium Node UI, please visit the following URL: <ip-of-your-node>:4449. Replace <ip-of-your-node> with the actual IP address of your SenseCAP M1 device.
10 Your SenseCAP M1 will be automatically added to the device list, where you can manage your MystNode deployment within the SenseCAP M1.
Note: The Hotspot page allows you to manage all the SenseCAP Helium Hotspots you have added, while the Device page allows you to manage various devices you have added, such as SenseCAP M4 Square and SenseCAP M1.