
Hi Community,
It’s been nearly a week since our SenseCAP MX family welcomed its second member, the SenseCAP M2 Data Only. There must be some questions and concerns related to the hotspot set-up and onboarding, but don’t worry, we are here to cover these topics and help you get started as soon as possible!
Set Up the SenseCAP M2 Data Only
Be sure to check the contents of the box when unboxing, which should include 5 objects:
- SenseCAP M2 Data Only Hotspot
- SenseCAP M2 Indoor Gateway User Manual
- Power Adaptor (Multiple Versions)
- LoRa Antenna Magnetic Base
- 3dbi LoRa Antenna
Here are the detailed steps of the set-up:
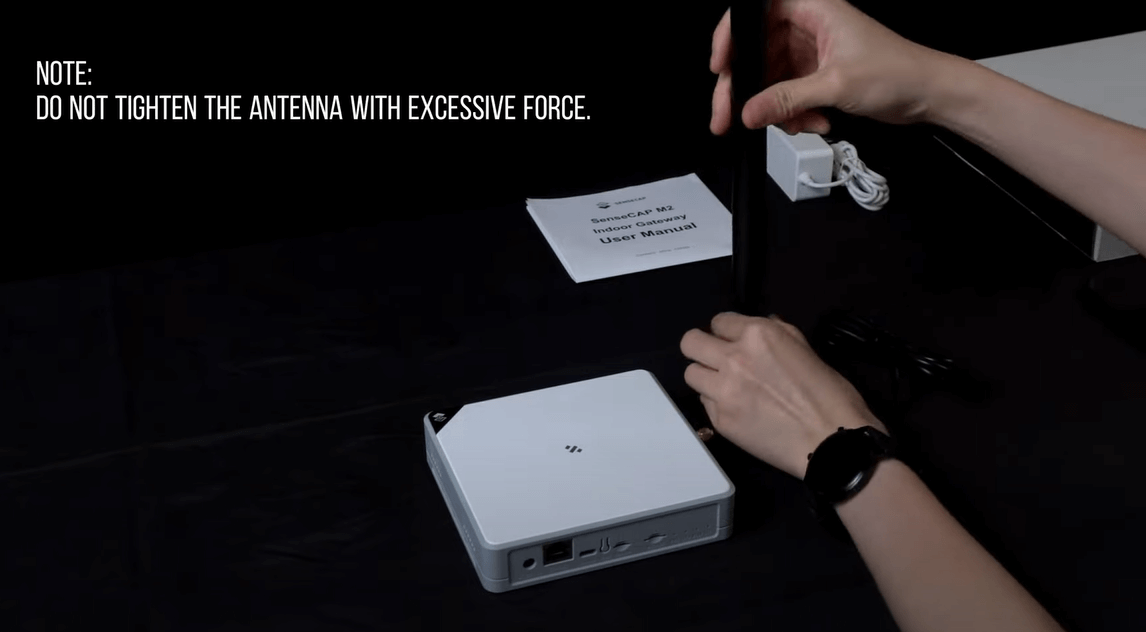
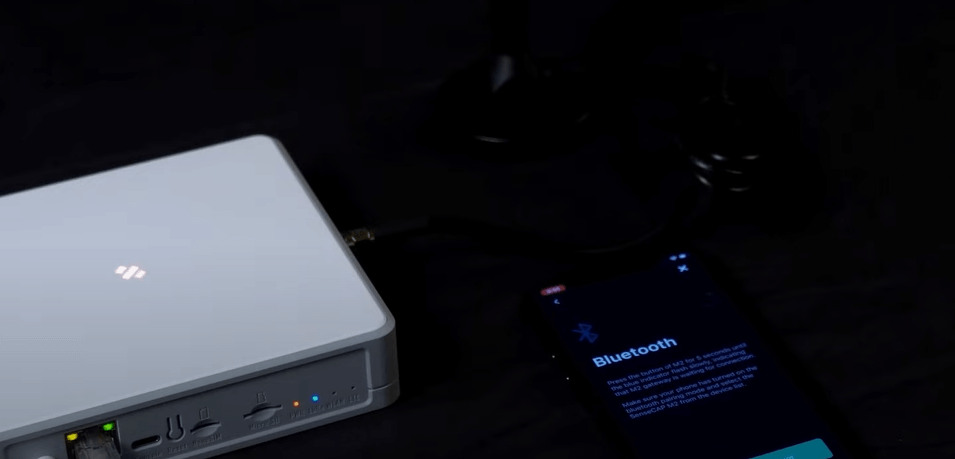
- Attach the antenna base to the hotspot and connect it with the antenna. Make sure you tighten the connector with appropriate strength.
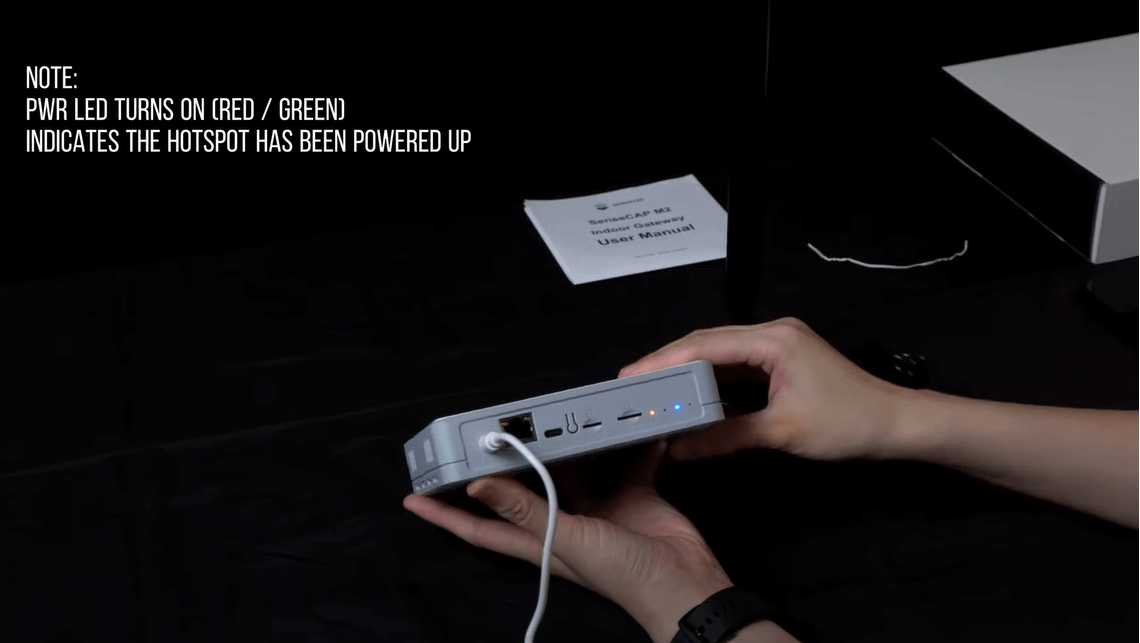
- Connect the power adaptor to the device. Please note that when the power LED light turns red or green, it indicates that the hotspot has been powered up.
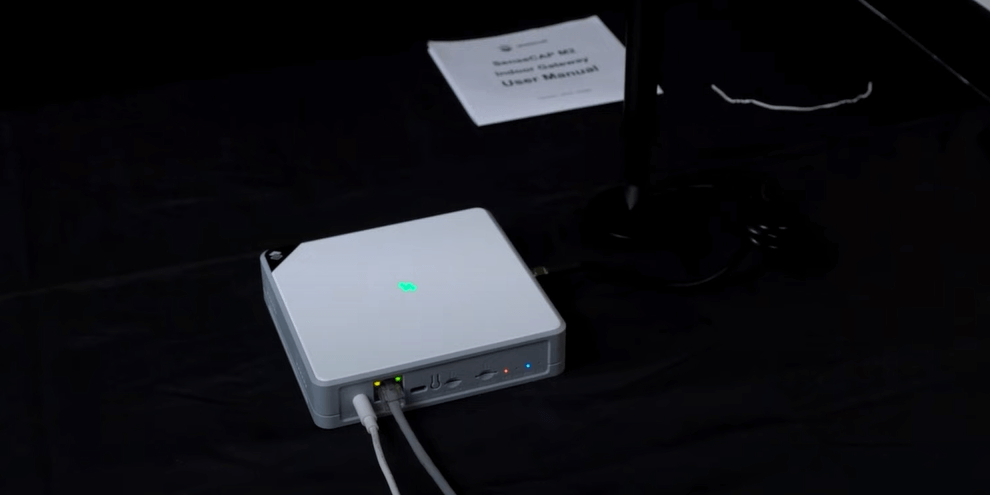
- Connecting the hotspot to the Internet via Ethernet cable is suggested. Or, if you prefer a Wi-Fi connection, you could skip this part and connect it with Wi-Fi after the setup. The boot-up will take about 40 seconds, and the indicator will show solid green when the boot-up is done.
Operations on SenseCAP Hotspot App and Helium Hotspot App
After you download the necessary Helium Hotspot app and the SenseCAP Hotspot app, create and log in to the account for SenseCAP and sign in to the Helium account on the Helium Hotspot App, you will be asked if you would like to link your Helium Wallet with SenseCAP.
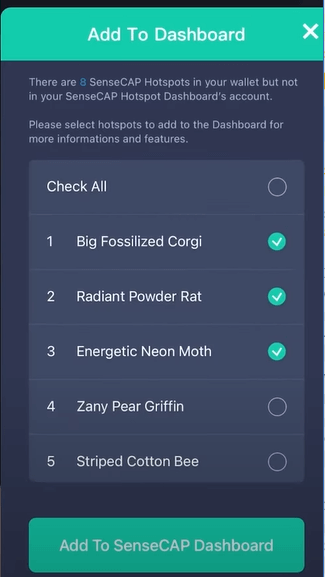
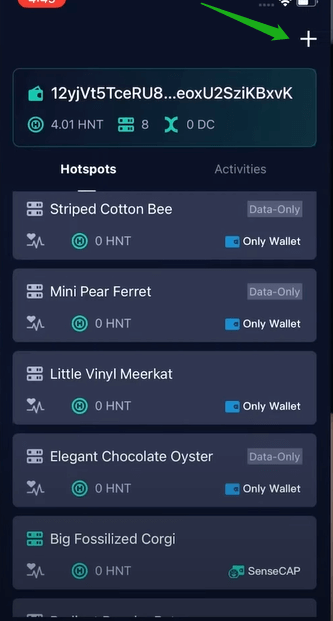
Confirm the link and the screen surface will switch to the SenseCAP Hotspot App. Here you can select the hotspots in your Helium Wallet and then add them to the SenseCAP account.
Upgrade the Firmware
The indicator will show slow orange when upgrading the firmware. This step starts automatically and will take a few minutes, normally for the brand new devices when they are connected to the Internet for the first time.
Do not turn off the device or disconnect the Internet during the upgrade, otherwise, there will be an error and the onboarding might fail. When the indicator shows in green, the firmware upgrade succeeds.
Register the SenseCAP Data Only Hotspot
- Open the SenseCAP Hotspot App and then click the “+” sign on the top.
- Choose the hotspot type, SenseCAP M2 data only, confirm several options, and start the Bluetooth connection by clicking “Scan for my Hotspot”.
- Long press for 5 seconds and then release your finger, you will see the indicator shows slow blue, which means it has been changed to configuration mode
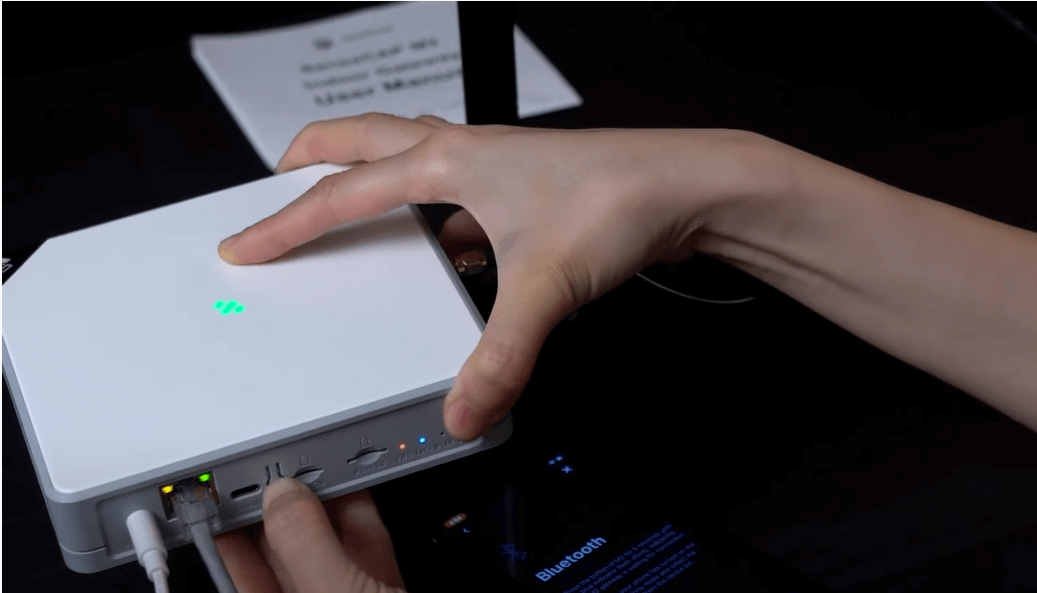
- After the App interface shows that there’s one hotspot found, you can click “SenseCAP M2” and wait for the connection.
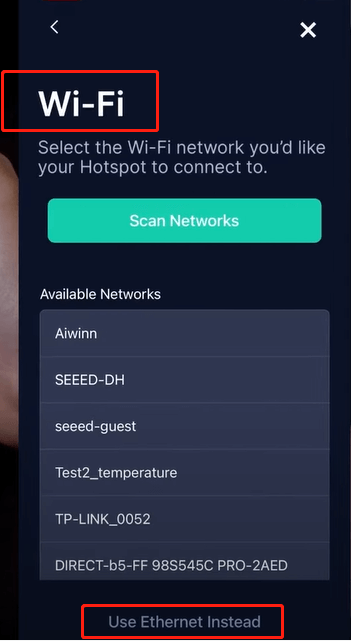
- Set up the Wi-Fi if you didn’t connect it via Ethernet Cable. Otherwise, just click “Use Ethernet Instead” to proceed.
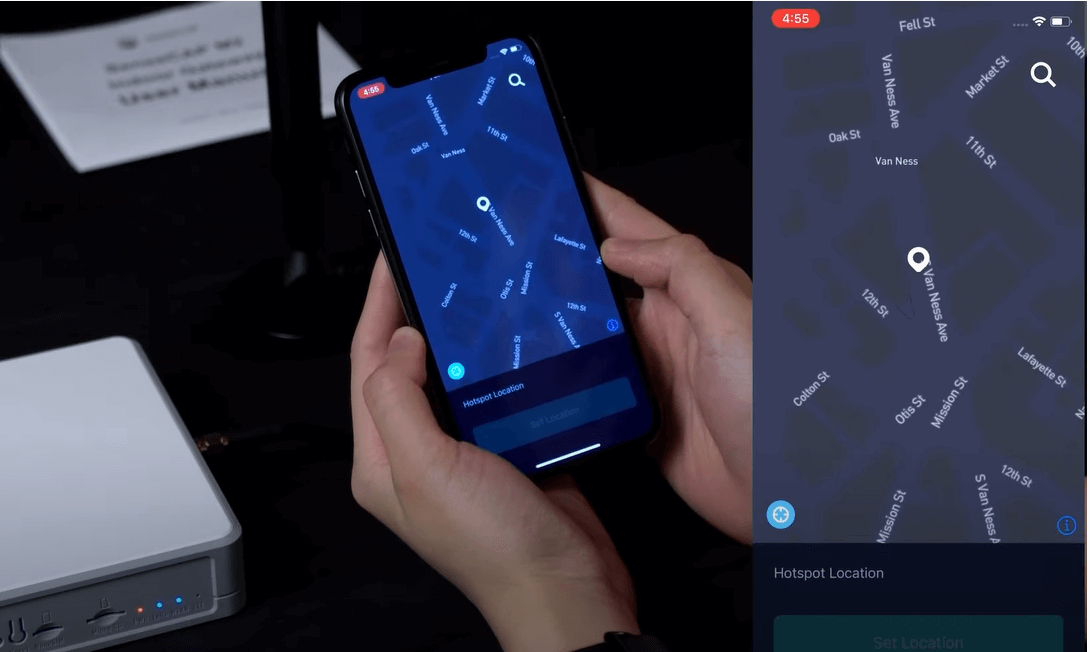
- Set up hotspot location after clicking “Ask for Permission”, or do it after the hotspot is onboarded. Search your location or future placement location on the map.
- Then comes the antenna setup. The default is Data Only with a 3dbi gain antenna. You should enter the height of the placement of your hotspot. Confirm the information and submit it.
- Automatically it will jump to your Helium Wallet and ask for your confirmation. Click to confirm and then wait for a period that depends on specific situations. So just turn back to the SenseCAP App to see if your hotspot has been registered successfully.
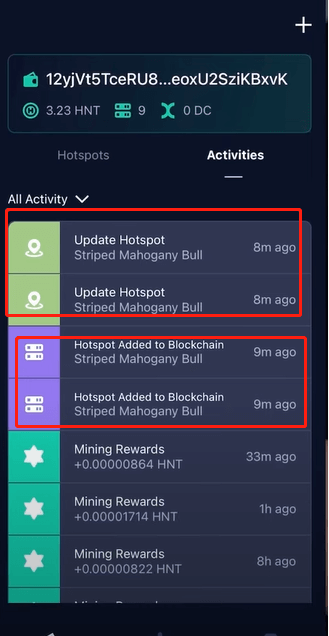
- Once there’s a new hotspot added to your list, you can check its activity. There are four new transactions listed. The first two are for the hotspot location update and the other two are for the hotspot added to the blockchain transaction. For SenseCAP M2 Data Only hotspot, there will be only two different transactions showing, so now you could make sure that the hotspot has been successfully onboarded to the Helium Network.
Above are everything related to the setup and onboarding process of SenseCAP M2 Data Only.
For more details, you can watch the video: https://www.youtube.com/watch?v=bdV57vFhgXg
For more user guide lessons, visit and subscribe SenseCAP MX Youtube channel: https://www.youtube.com/channel/UC2AGp_bAnmQIHQICasz0bdg/featured
Keep track of the latest news and products of SenseCAP MX Helium Hotspot: https://www.sensecapmx.com