
Hey Community,
Still looking for a tutorial to assemble your SenseCAP Outdoor Enclosure? Here comes the Unboxing & Assembly Video! In this video, we are going to show you the unboxing of the product and how you can assemble the SenseCAP Outdoor Enclosure with the SenseCAP M1 Hotspot. Hope this video is helpful for you to expand your IoT application to the outdoor and off-grid areas. Let’s bring IoT Into the Wild!
Being specially designed to meet all your needs to put the gateways outdoors, SenseCAP Outdoor Enclosure has a decent size that is able to allocate most of the mainstream hotspots, such as BobCat 300, RAK hotspot, Cal-Chip, Nebra, Helium hotspot, etc.

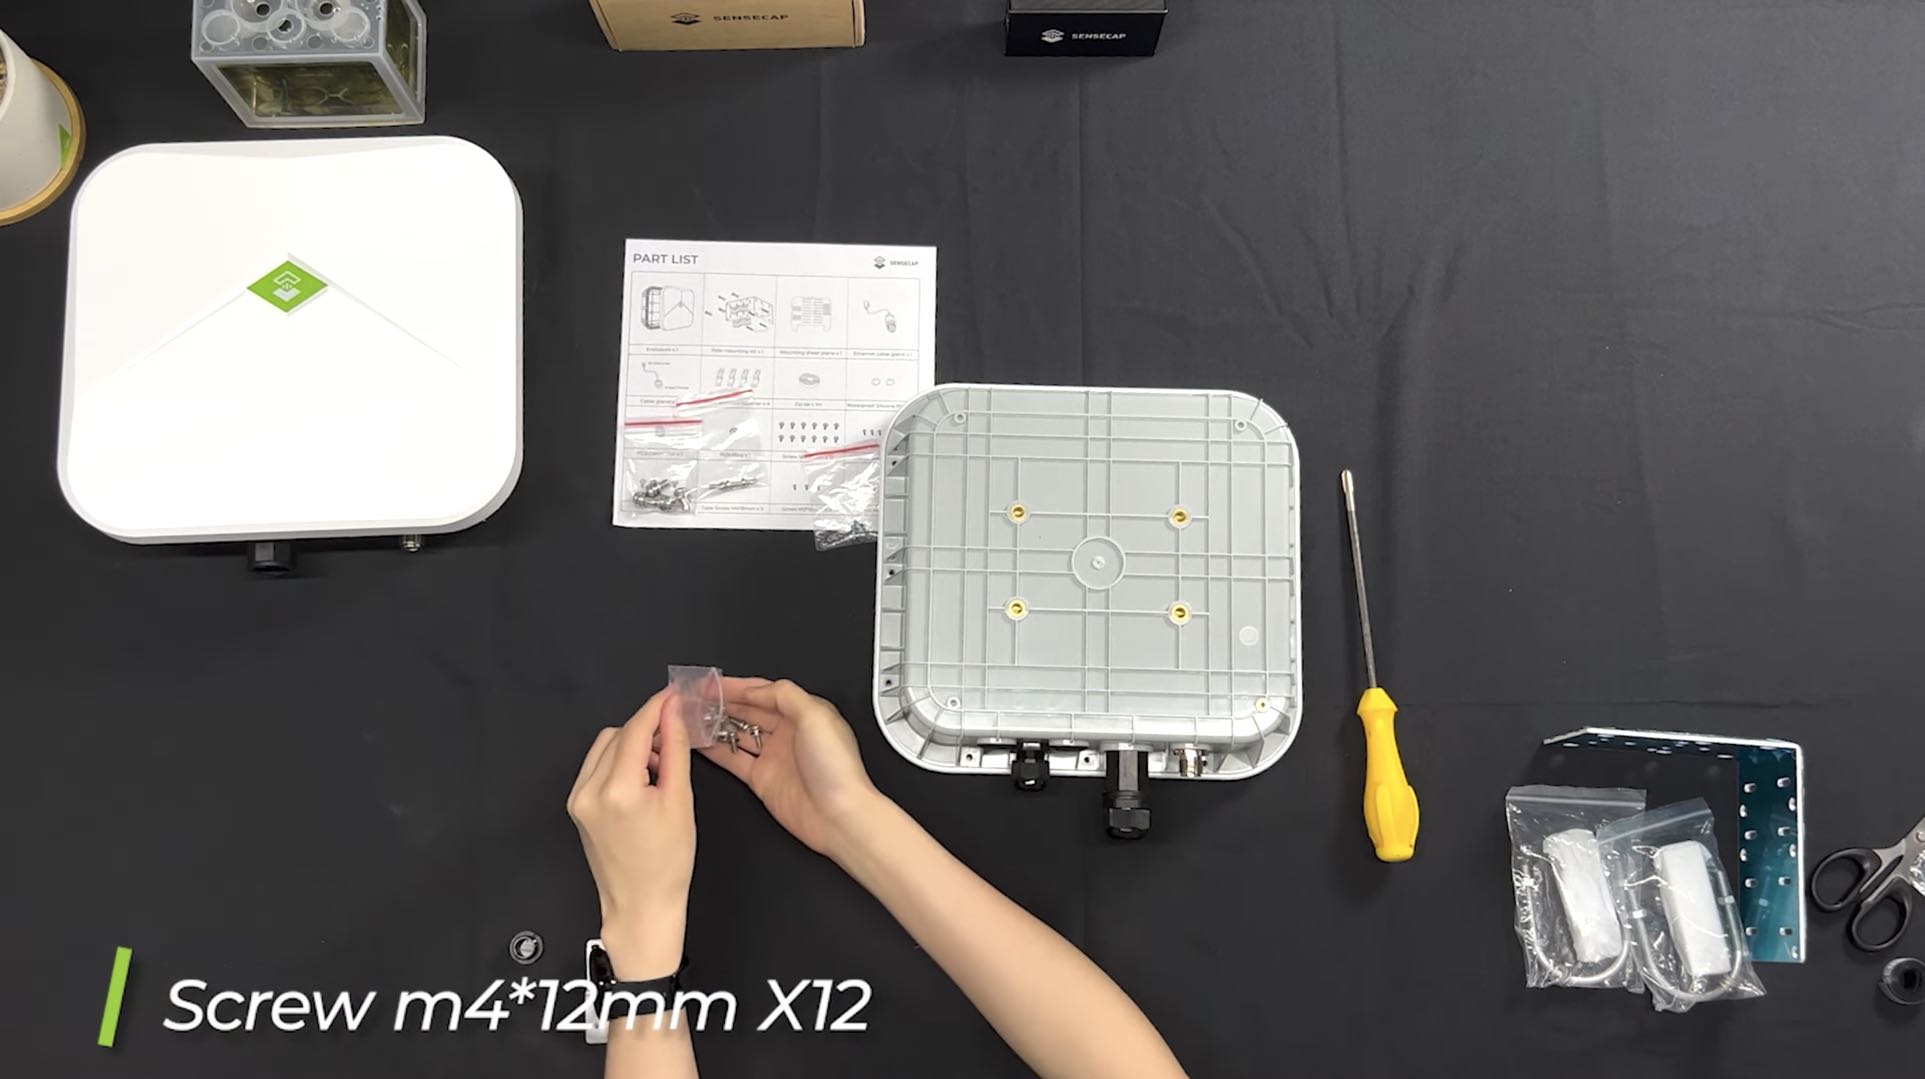
PART LIST INTRODUCTION
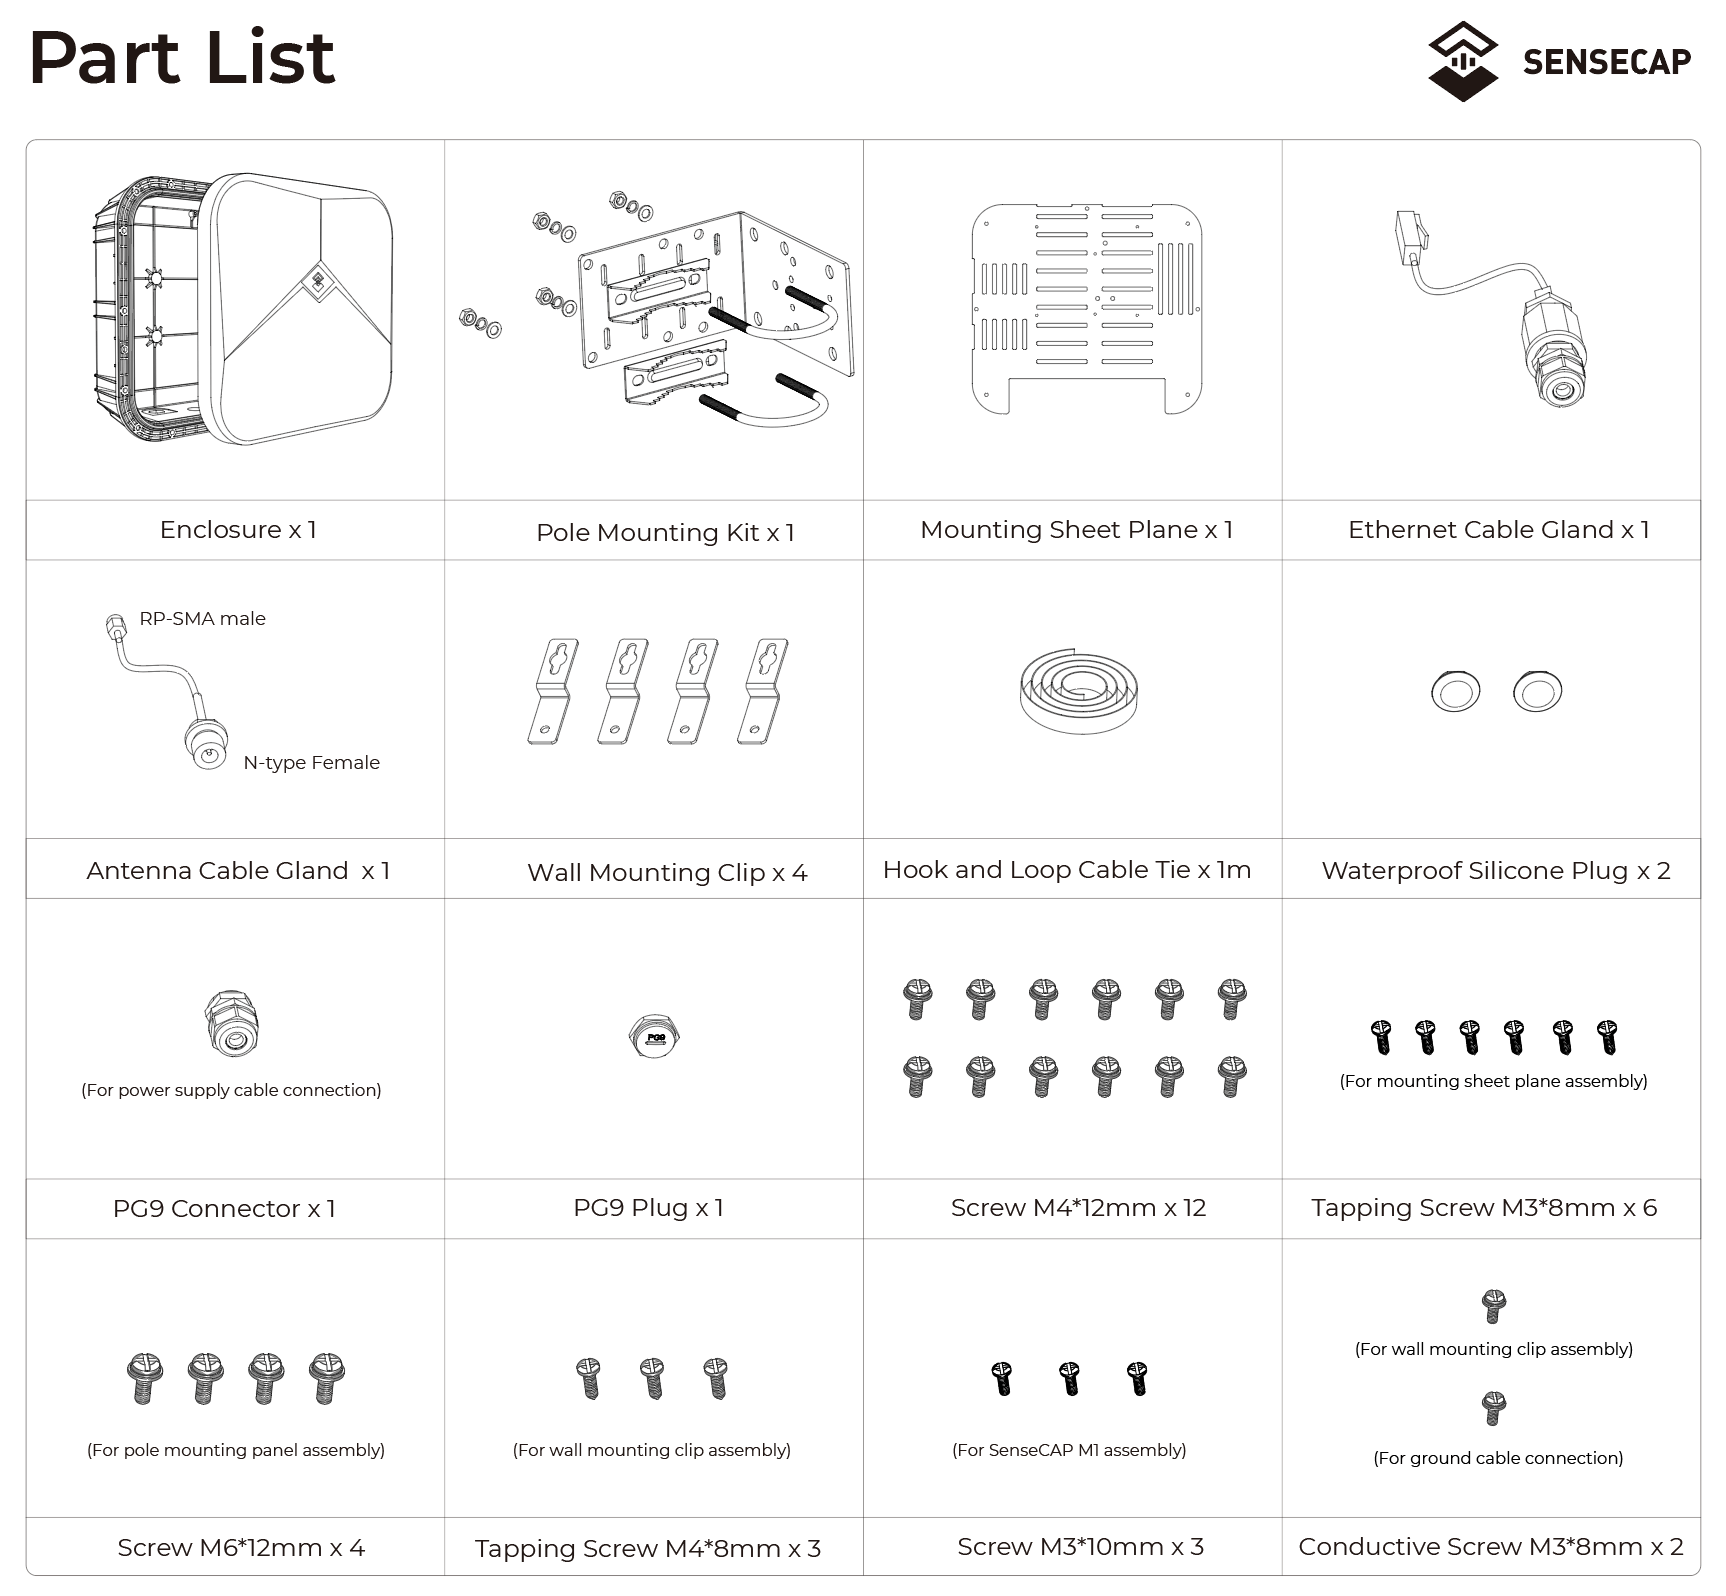
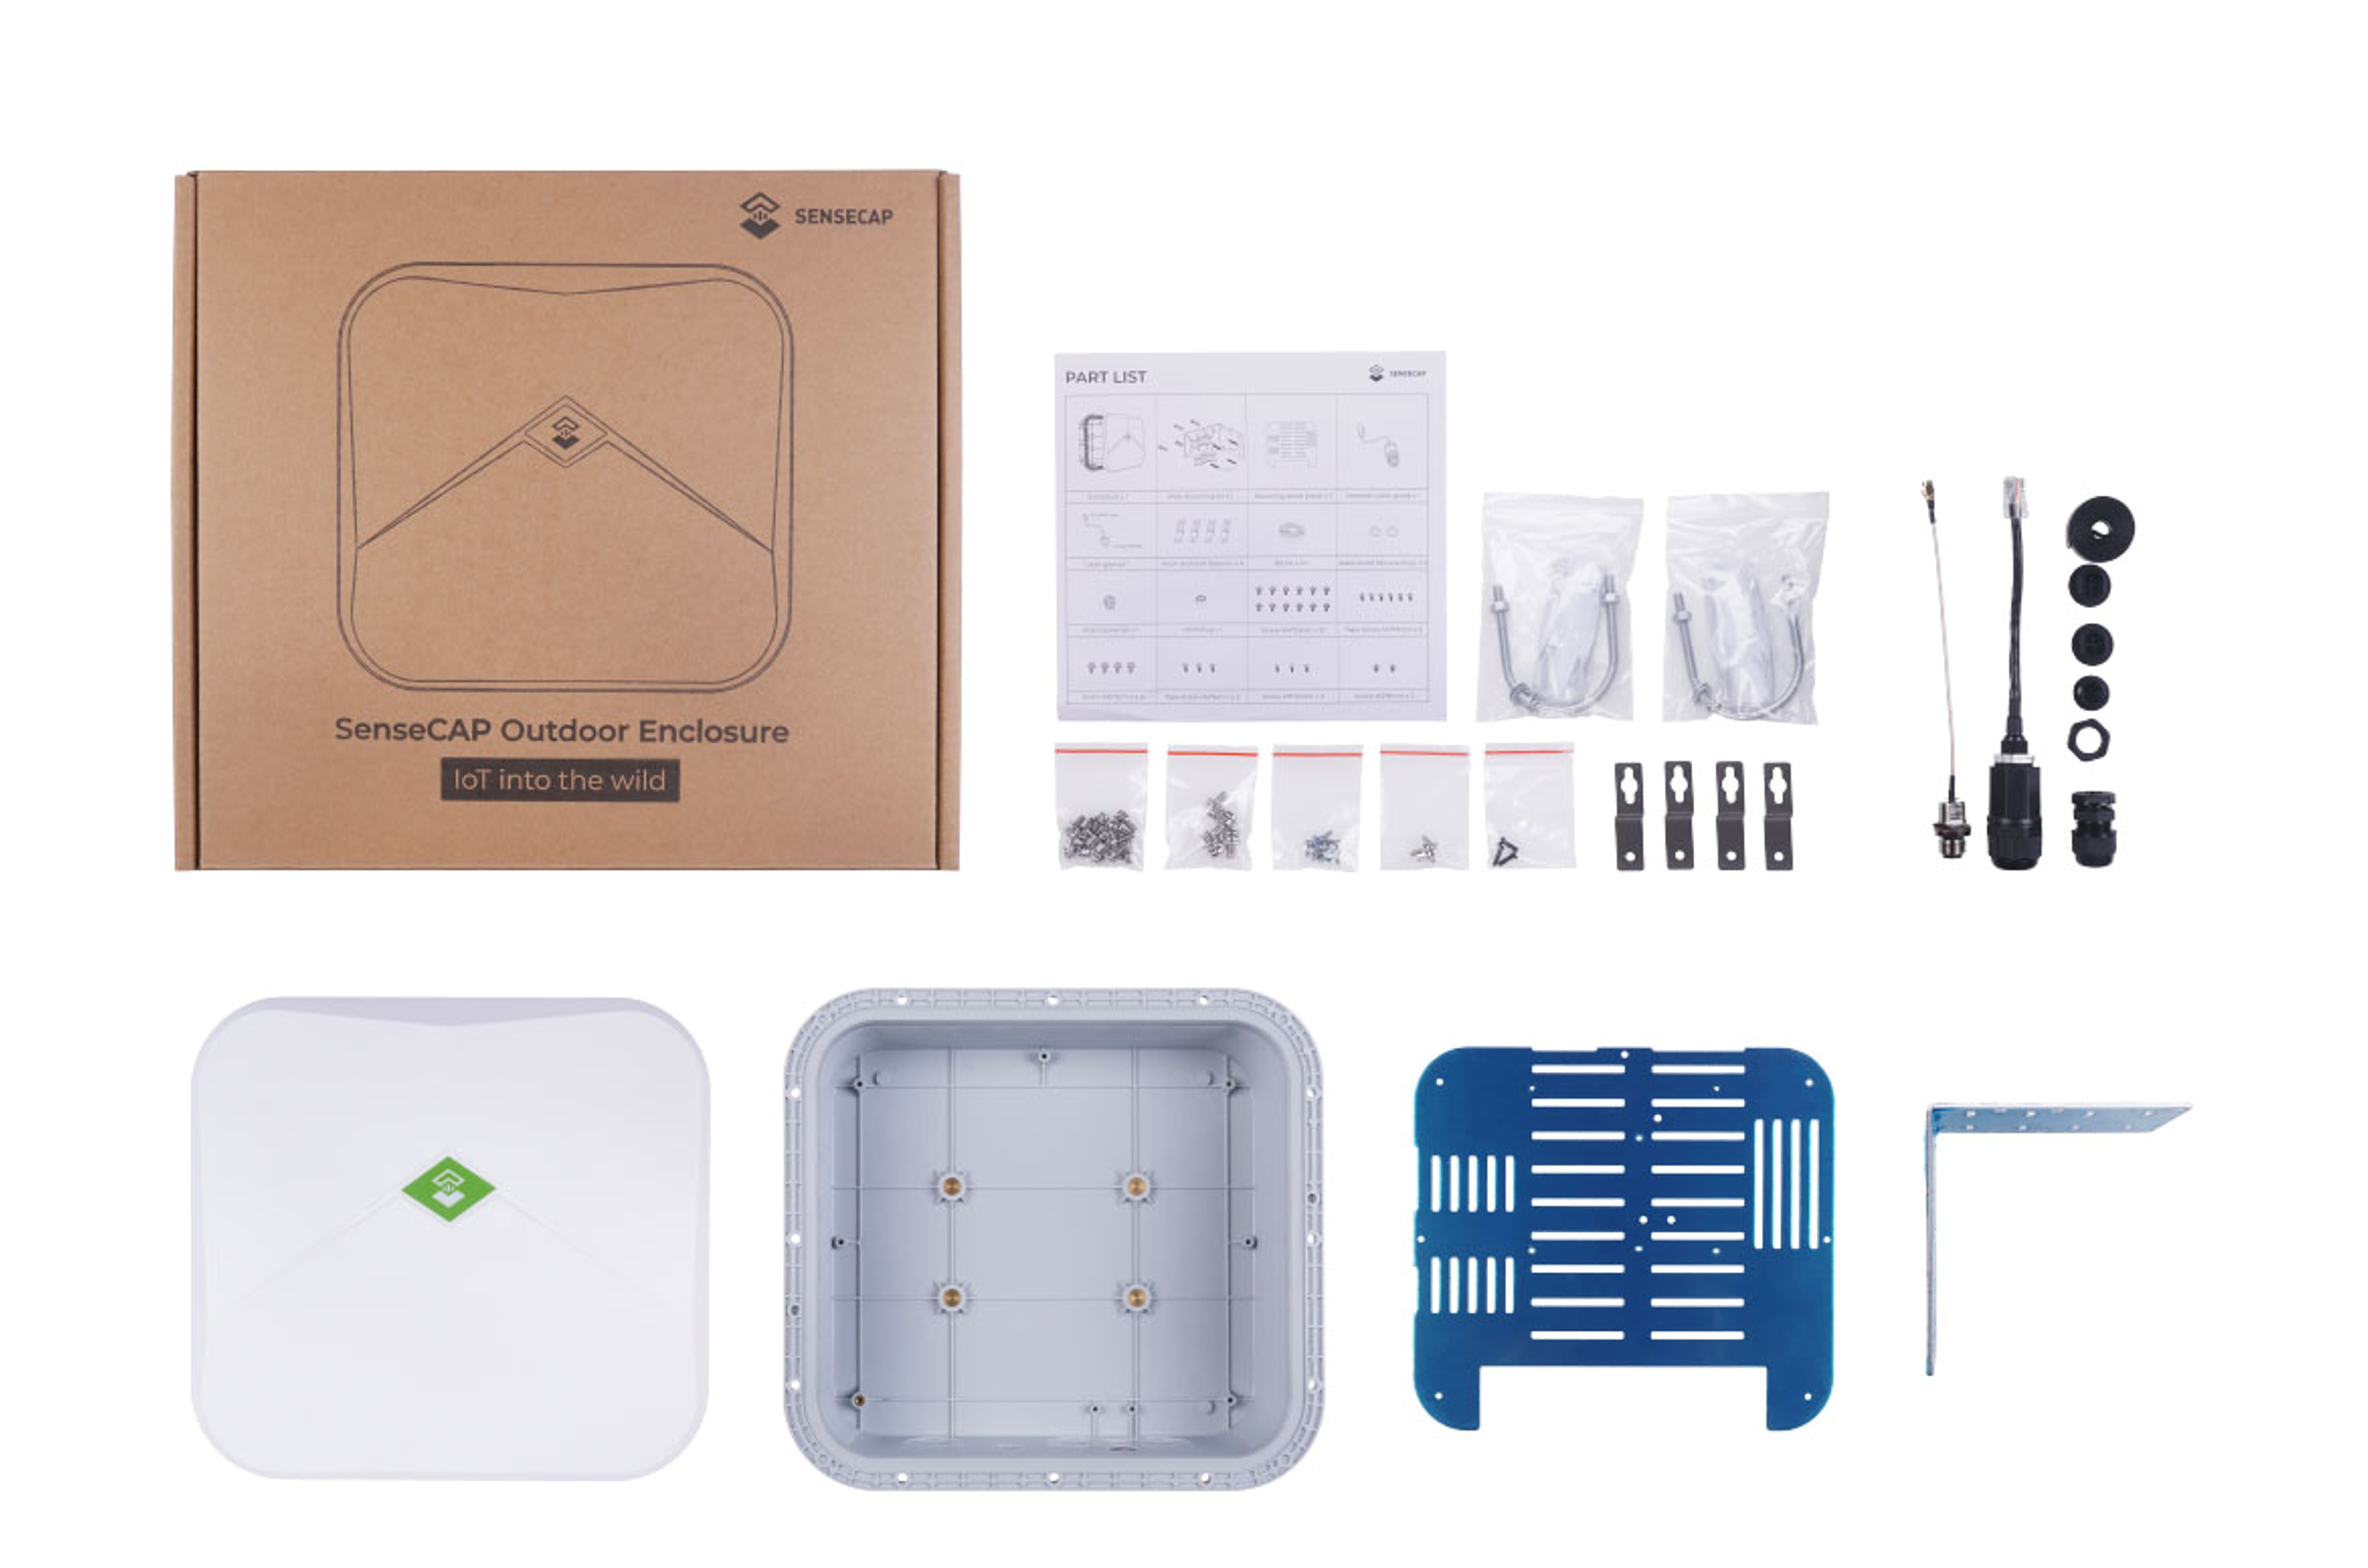
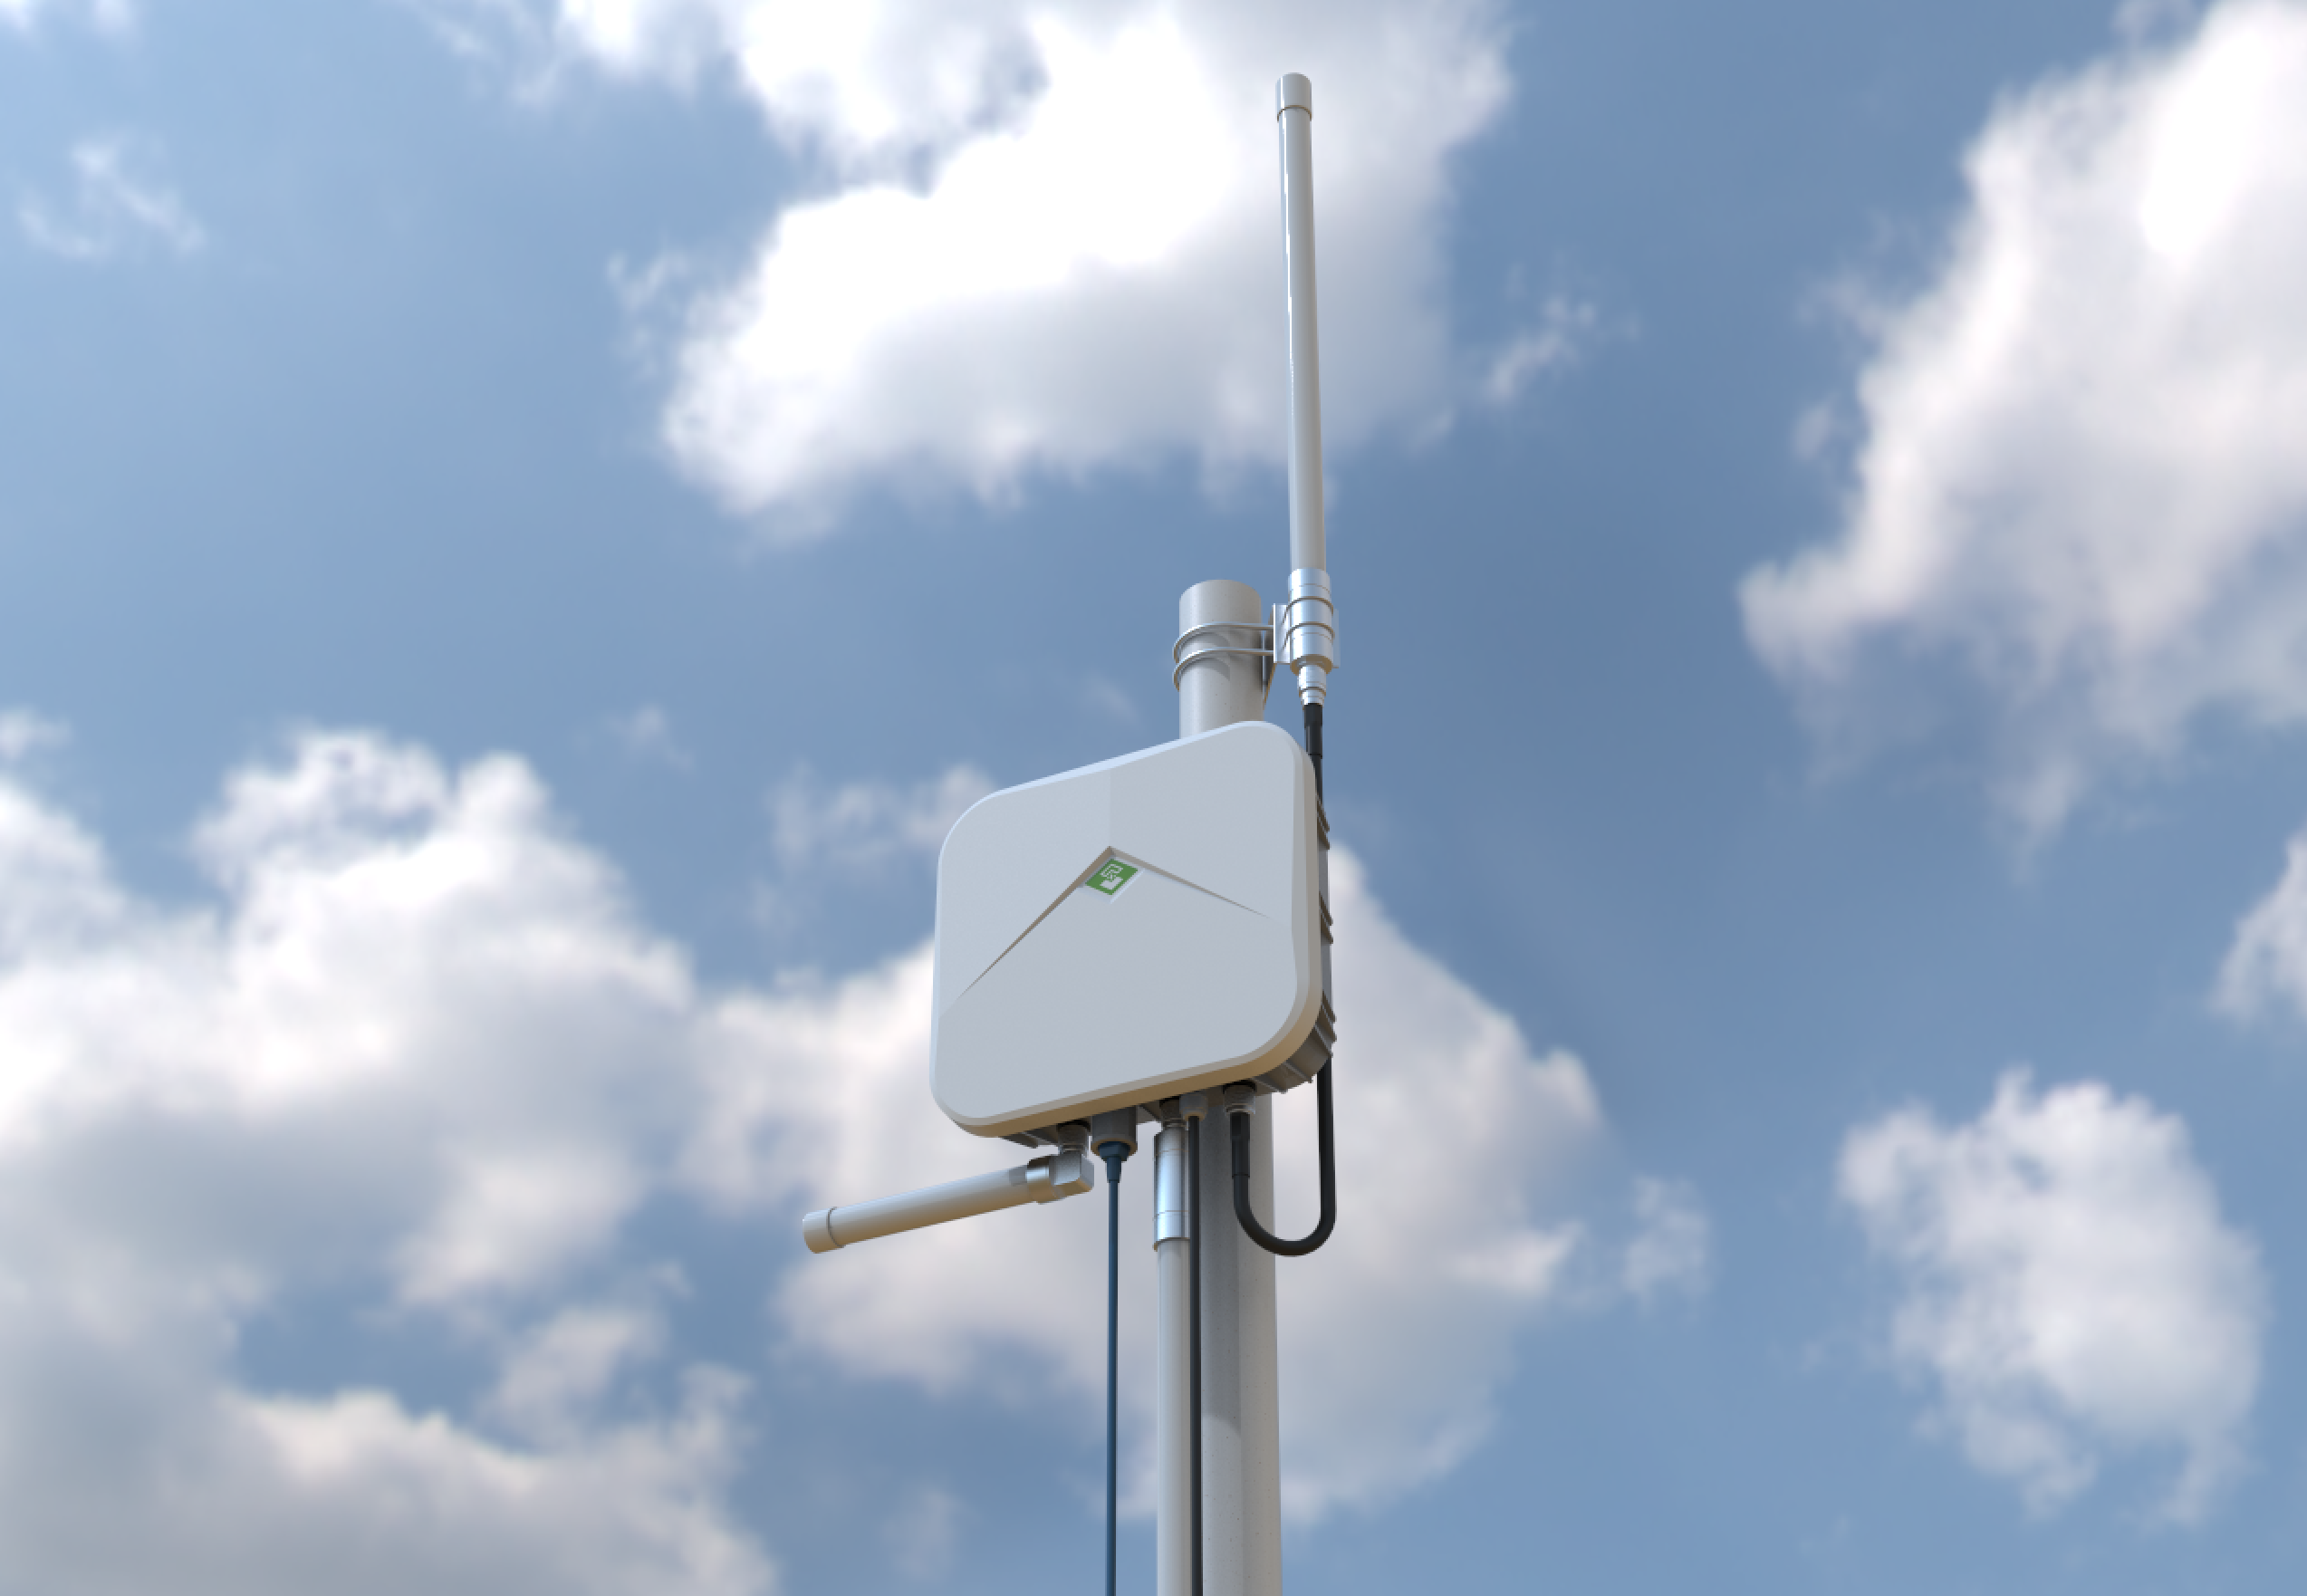
With multiple types of extended interfaces provided, including 3* N-type female interface for LoRa Antenna, 1* Ethernet connector with cable gland for Ethernet cable, 1* PG9 interface for power supply, and 1* lightning arrestor ground connector reserved on the bottom cover, SenseCAP Outdoor Enclosure helps you easily connect your hotspot with the Ethernet cable, fiberglass antenna, 4G antenna, GPS antenna, solar panel power station, lightning arrestor, etc. IP66 waterproof rate keeps it safe from dust and water when placed outdoors.
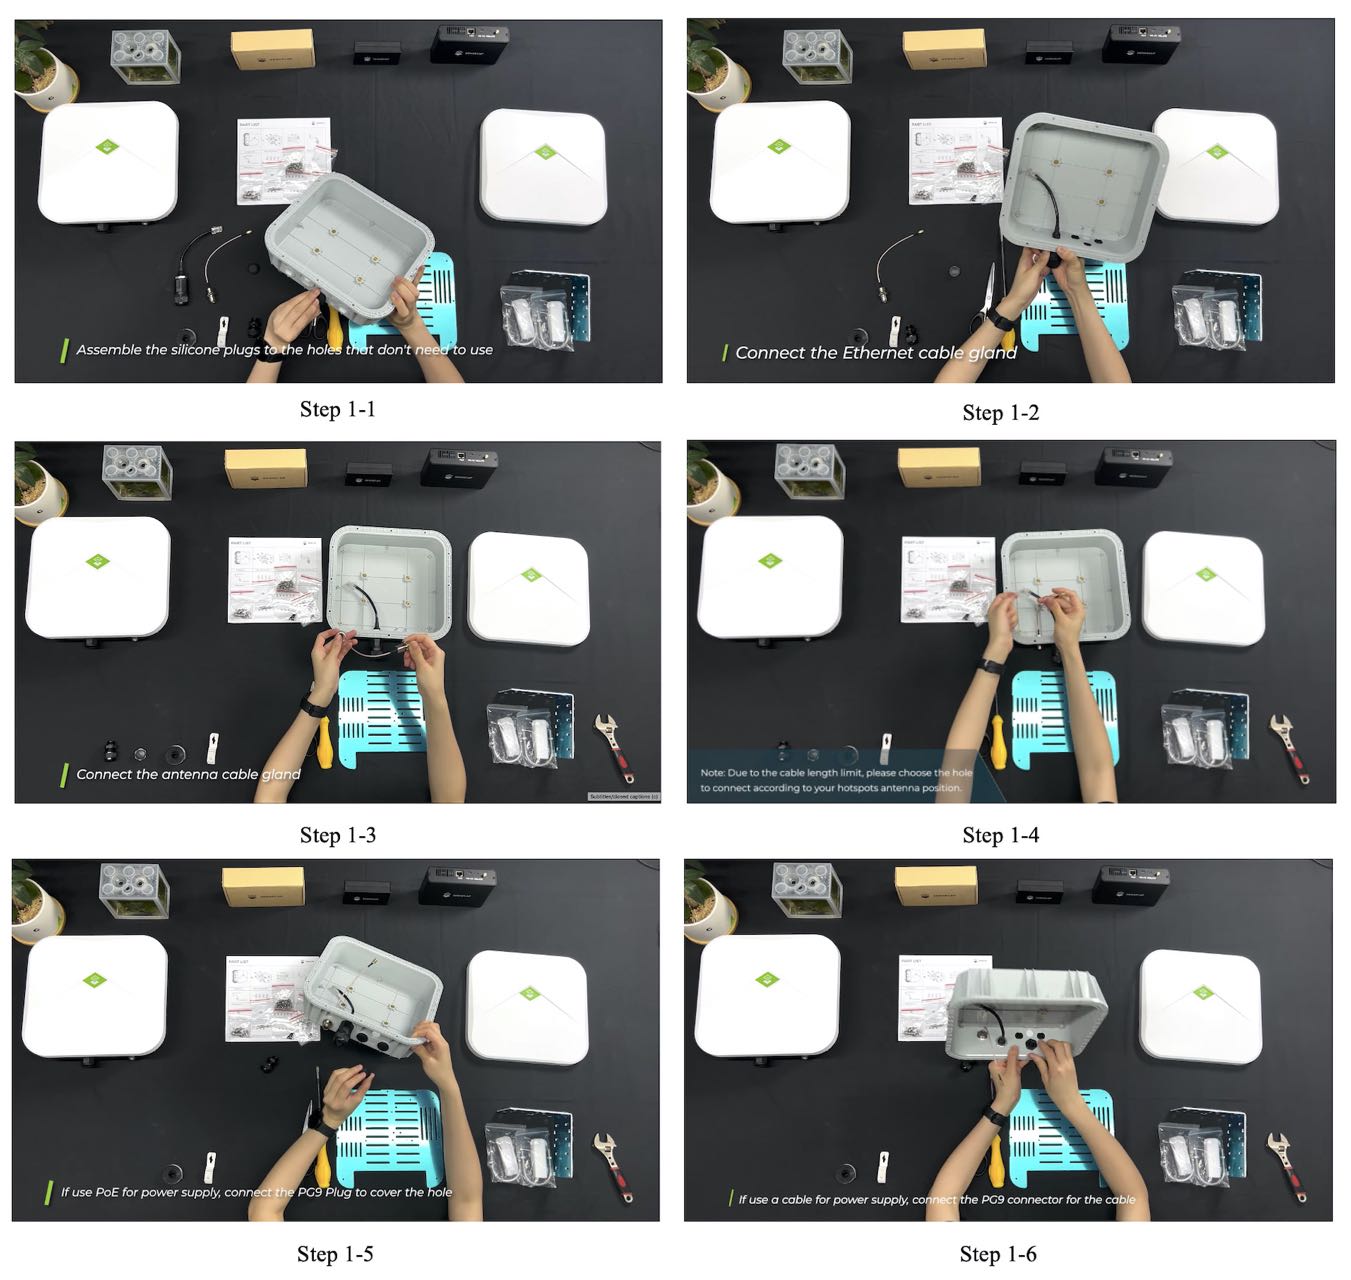
Note: All cable glands and connectors are not assembled to the enclosure holes, providing users with more flexibility to choose what to use based on different scenarios. Waterproof silicon plugs are provided for the unused holes.
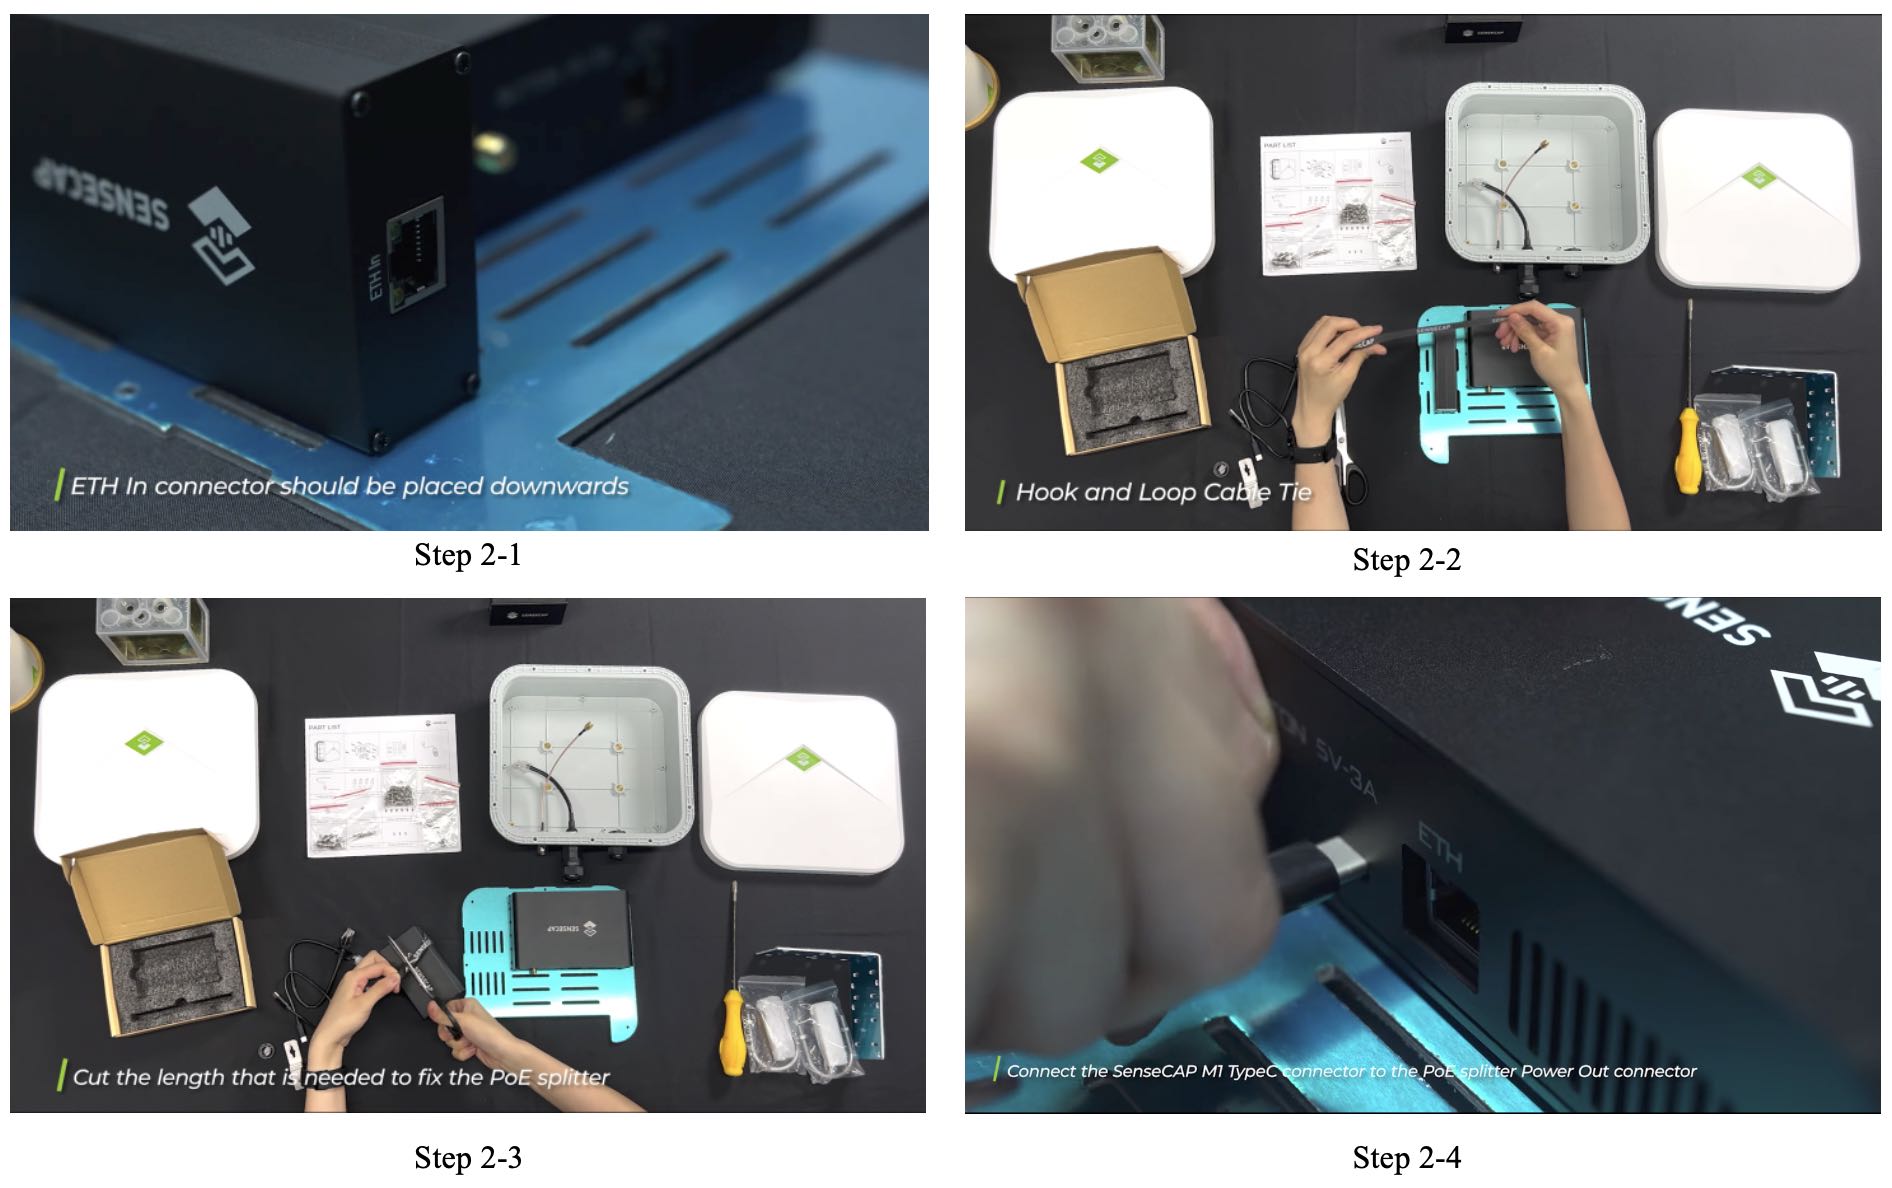
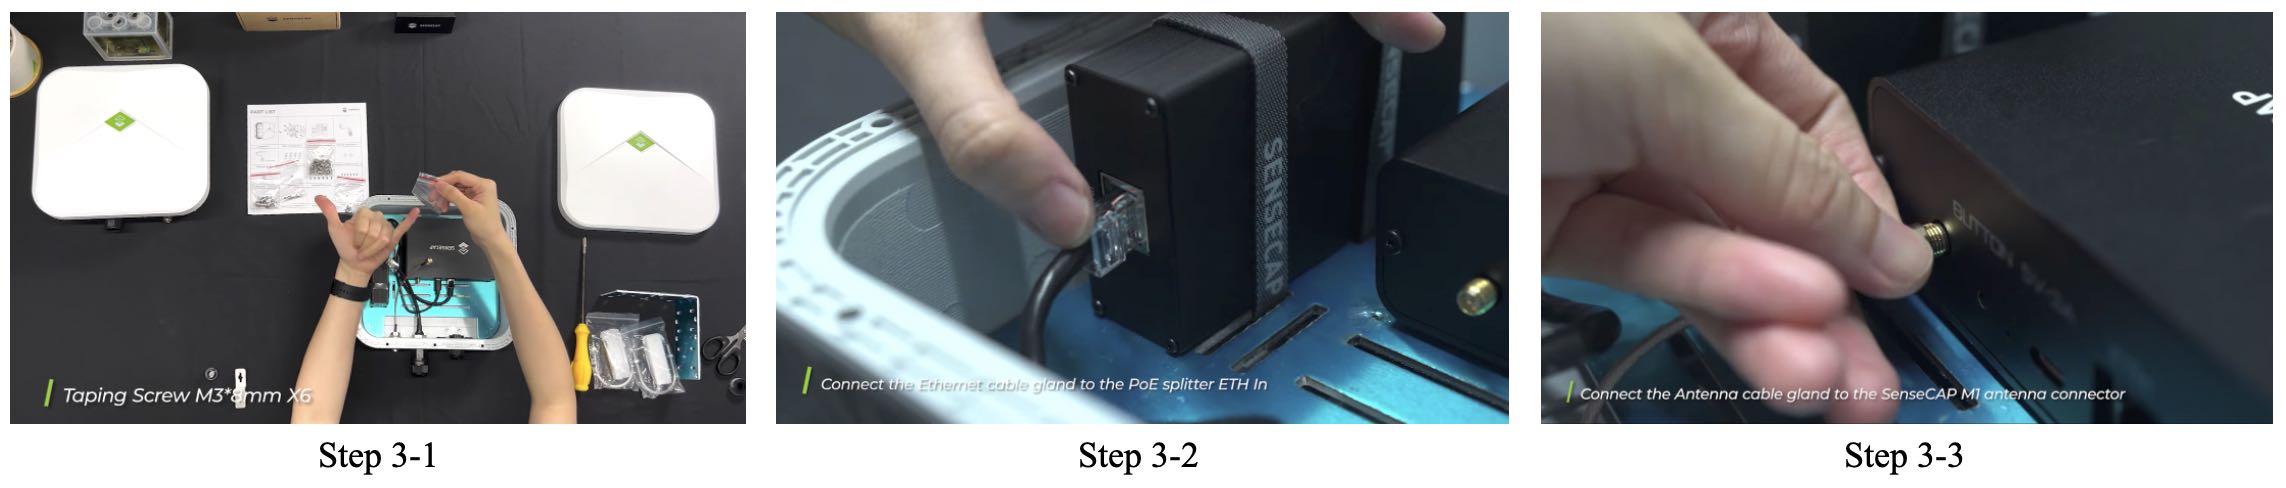
6 Steps to Assemble the SenseCAP Outdoor Enclosure
Step 1: Connect the Cable Glands and Silicone Plugs (2:57-4:57)
Step 2: SenseCAP M1 and PoE Assembly (4:58-7:50)
Step 3: Mounting Sheet Plane Assembly (7:51-8:54)
Step 4: Enclosure Cover Assembly (8:55-9:48)
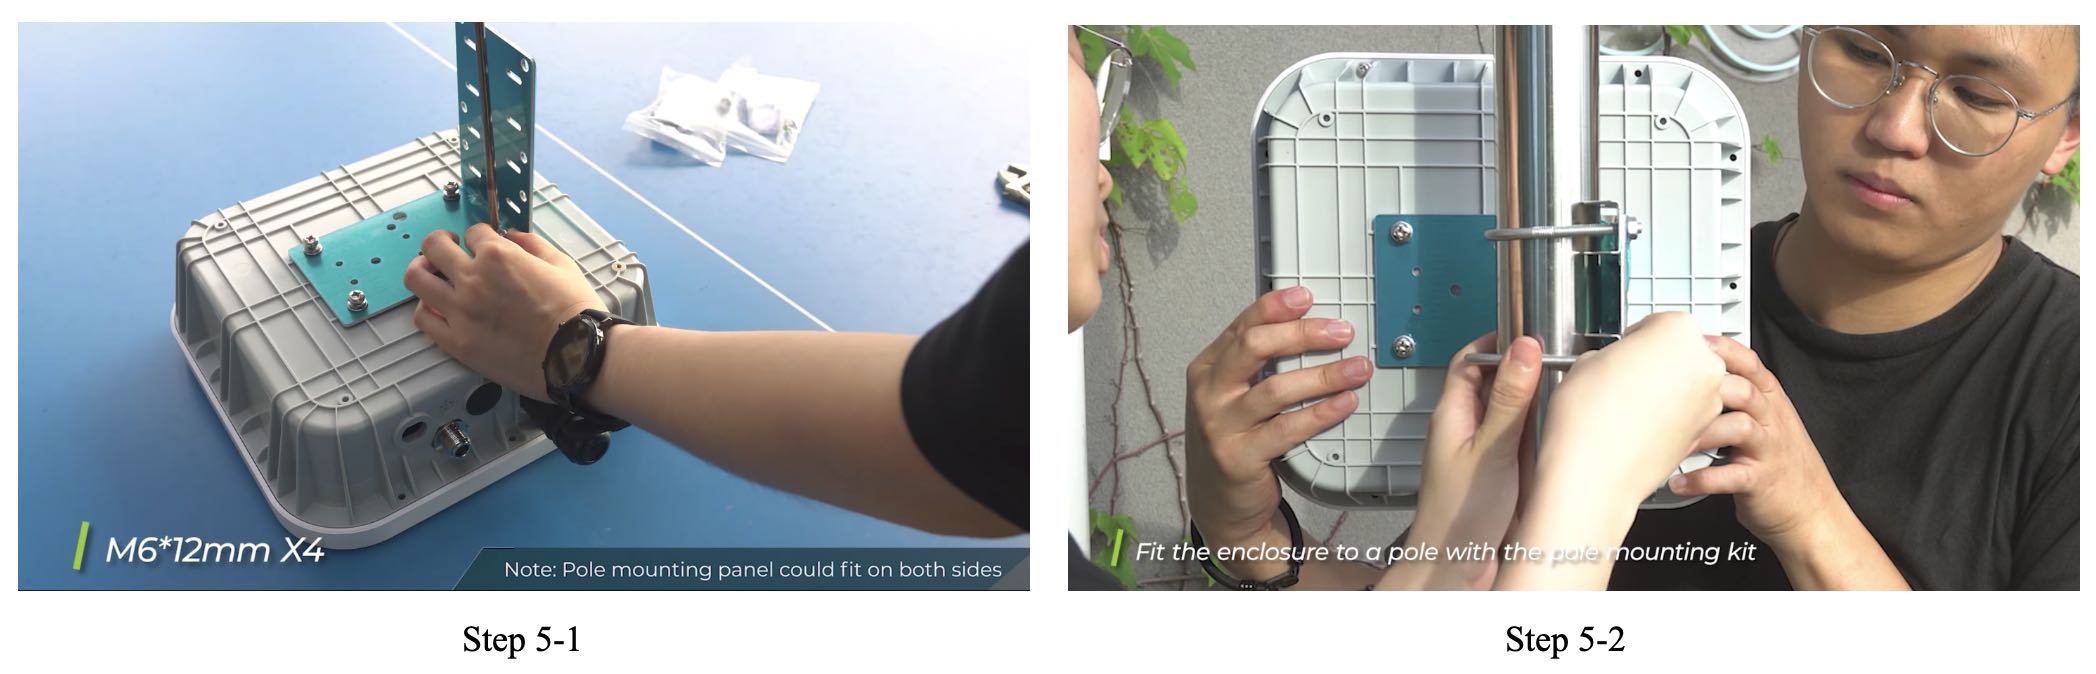
Step 5: Pole Mounting Panel Assembly (9:52-10:41)
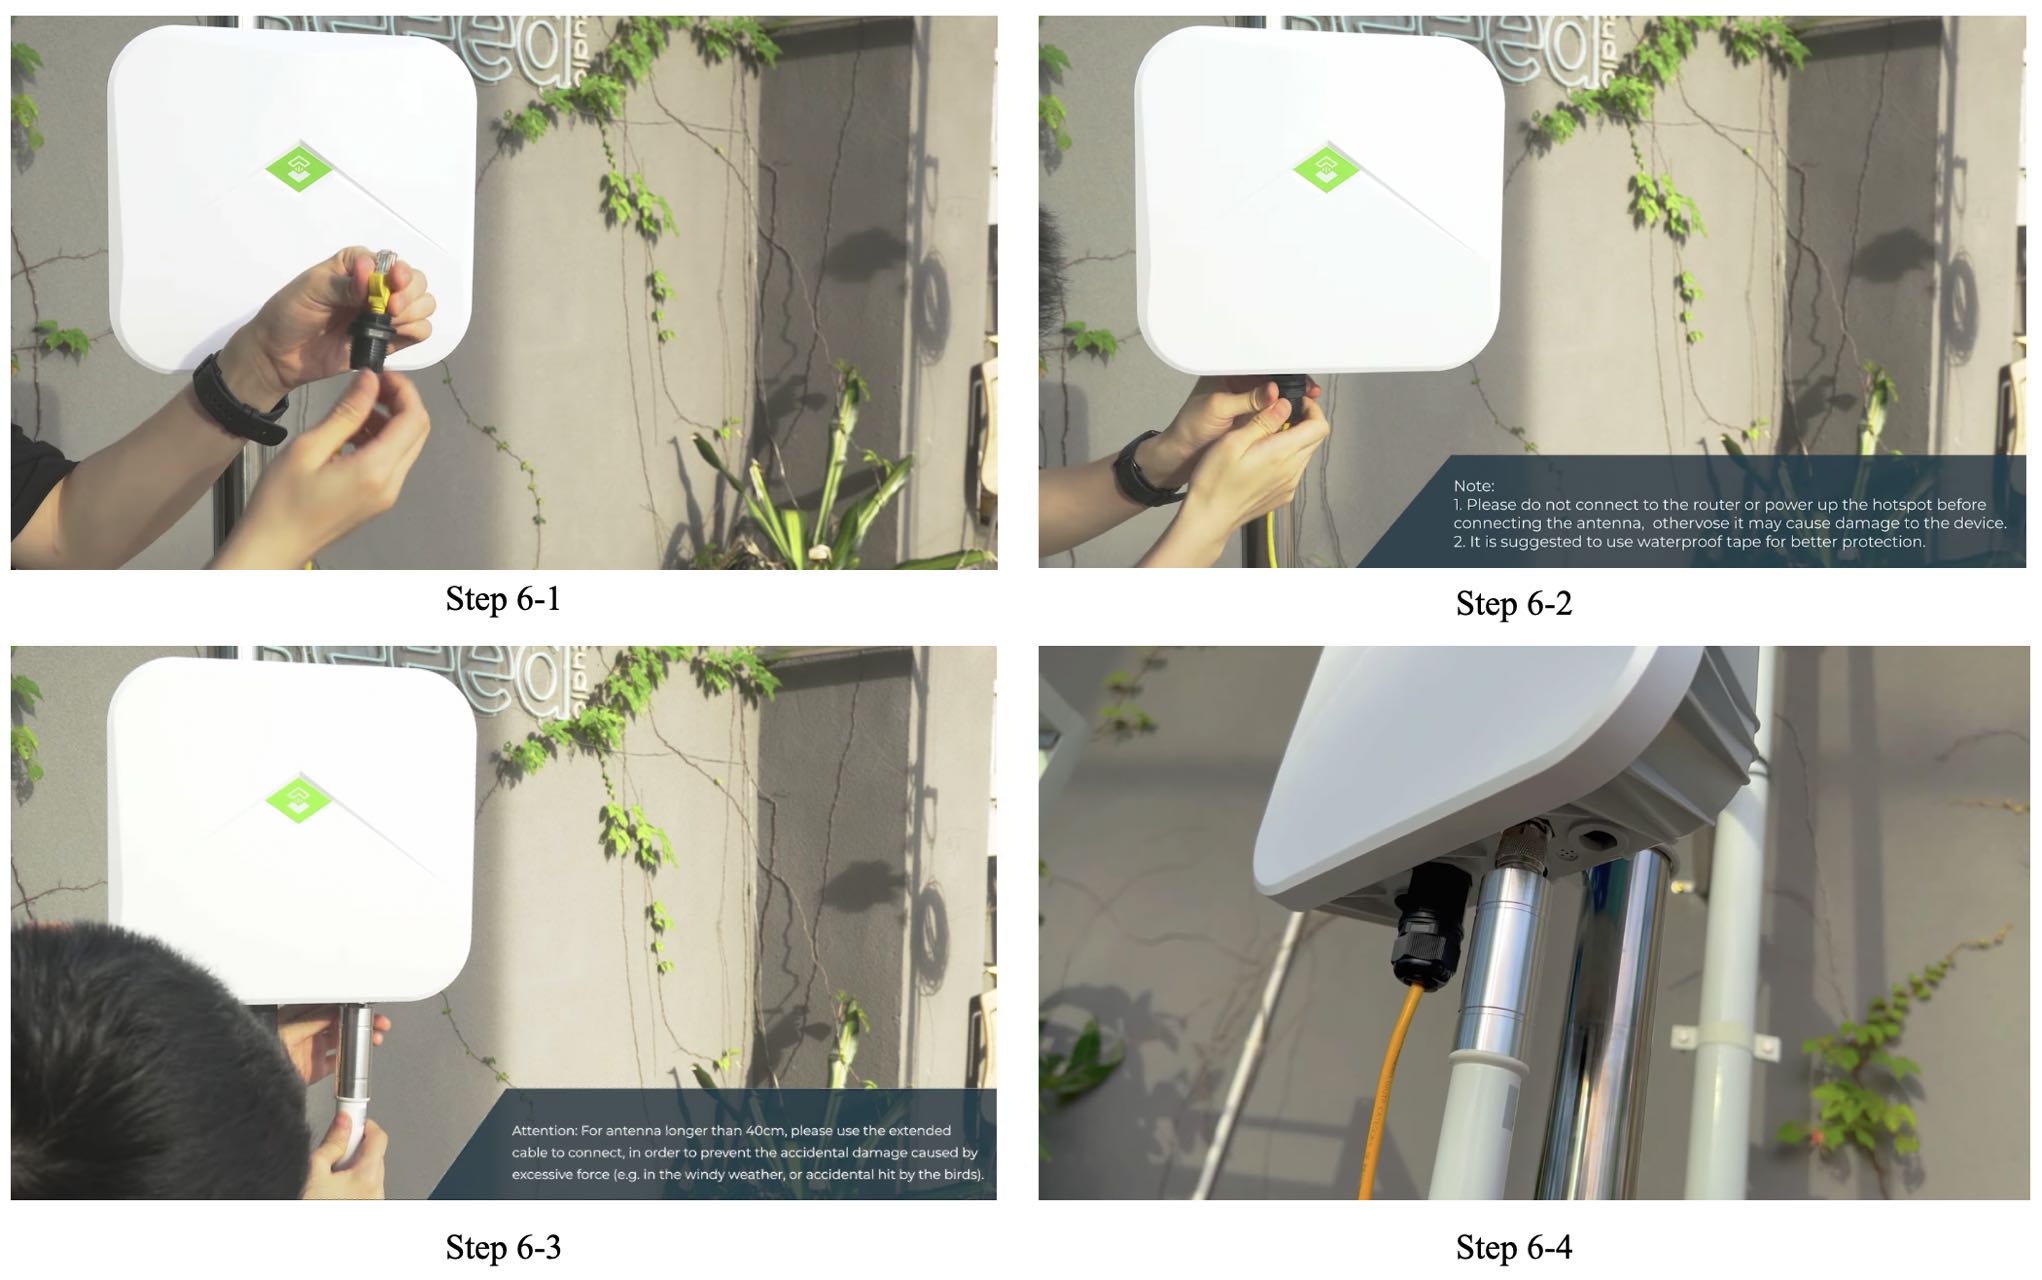
Step 6: Connect the Ethernet Cable (10:42-12:05)
Notes:
1. It is suggested to use waterproof tape for the Ethernet and Power connector for better protection.
2. Please do not connect to the router or power up the hotspot before connecting the antenna, otherwise it may cause damage to the device.
3. For antennas longer than 40cm, please use the extended cable to connect, in order to prevent accidental damage caused by excessive force (e.g. in the windy weather, or accidental hit by the birds).
Attention
The working temperature of the outdoor enclosure is -40~85°C, and it provides IP66-rated waterproof and basic protection of the hotspots in general weather conditions outdoor area. Users should always keep in mind that it is important to make sure the inner temperature does not exceed the specified working temperature range of each component assembled inside, such as the hotspot, PoE, and battery management controller.
If your placement is in a high-temperature weather area and has a long period of direct sunlight, it is highly suggested to add an additional cover or put the enclosure under the solar panel to prevent overheating damage to the internal device.
Please note that SenseCAP will not be responsible for the damage to the inside devices due to users’ misuse in inappropriate extreme weather conditions.
Click here to Get One Now!
To stay updated on the latest news, you’re invited to follow us on Twitter or join our Discord Community.
Meanwhile, you can keep track of the latest news and information on the SenseCAP MX Helium Hotspot series through our official site.